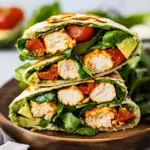
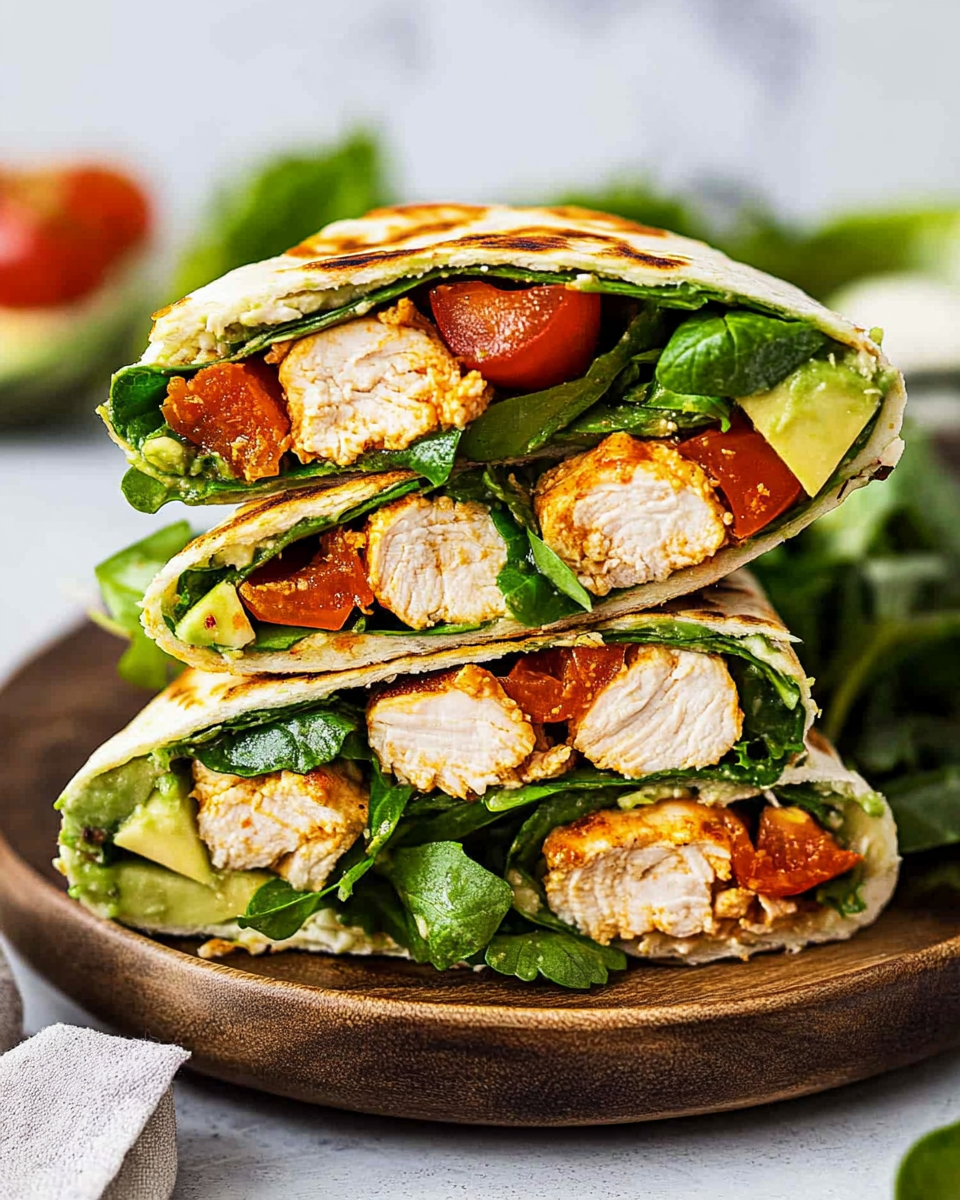
Few meals strike the perfect balance between nutritious and delicious like these Healthy Chicken Avocado Wraps. Bursting with lean protein, creamy avocado, and fresh vegetables, these wraps are a versatile option for quick lunches, meal prep, or even light dinners. The combination of juicy grilled chicken, sharp cheddar cheese, and a hint of sour cream creates a satisfying texture and flavor profile that appeals to both adults and kids. Best of all, they come together in just 20 minutes, making them ideal for busy weekdays.
Preparation Phase & Essential Tools
Before diving into the recipe, gathering the right tools ensures a smooth cooking process. Here’s what you’ll need:
- Skillet or Frying Pan: A sturdy, medium-sized skillet is essential for cooking the chicken evenly. Non-stick pans work best to prevent sticking without excessive oil.
- Cutting Board and Sharp Knife: A large cutting board and a sharp chef’s knife make prepping vegetables and slicing chicken effortless.
- Grill Pan or Griddle: While optional, a grill pan adds appealing char marks and crispness to the assembled wraps.
- Mixing Bowls: Use separate bowls for chopped lettuce, diced tomatoes, and avocado to keep ingredients organized.
- Measuring Cups and Spoons: Precision matters, especially for balancing flavors like sour cream and cheese.
Why These Tools Matter
- A skillet ensures the chicken cooks evenly, retaining moisture without drying out.
- A grill pan elevates the wraps by creating a crispy exterior, mimicking the texture of restaurant-style wraps.
- Sharp knives prevent bruising vegetables and ensure clean cuts for uniform filling distribution.
Preparation Tips for Success
- Chicken Prep: Pat the chicken breasts dry with paper towels before seasoning. This helps achieve a better sear and prevents steaming.
- Avocado Handling: Dice the avocado just before assembling to minimize browning. A squeeze of lime juice can extend its freshness.
- Tortilla Tricks: Lightly warm tortillas in a dry pan or microwave for 10 seconds to make them pliable and prevent cracking during rolling.
- Cheese Choices: Freshly grated cheddar cheese melts better than pre-shredded varieties, which often contain anti-caking agents.
Ingredients List
For the Healthiest Chicken Avocado Wraps, you’ll need:
For the Wraps
- 2 boneless, skinless chicken breasts (about 1 lb), cooked and thinly sliced
- 6 large burrito-sized tortillas (whole wheat or spinach for extra nutrients)
- 3 cups chopped lettuce (romaine or butter lettuce for crunch)
- 1 large tomato, finely diced
- 1 ripe avocado, cubed
- 1 cup sour cream (or Greek yogurt for a lighter option)
- 3 cups shredded sharp cheddar cheese
For Cooking the Chicken
- 1 tablespoon olive oil
- Salt and black pepper, to taste
Step-by-Step Instructions
Cook the Chicken
- Heat olive oil in a skillet over medium-high heat.
- Season the chicken breasts generously with salt and pepper.
- Cook for 5–7 minutes per side, or until the internal temperature reaches 165°F (74°C).
- Transfer to a cutting board, let rest for 5 minutes, then slice into thin strips.
Prepare the Fillings
- Chop the lettuce into bite-sized pieces.
- Dice the tomato and avocado separately to maintain texture.
- Grate the cheese if not using pre-shredded.
Assemble the Wraps
- Lay a tortilla flat on a clean surface.
- Spread 1 tablespoon of sour cream evenly over the center.
- Layer with:
- ½ cup chopped lettuce
- ¼ cup diced tomatoes
- 3–4 avocado cubes
- 4–5 chicken slices
- ¼ cup shredded cheddar cheese
- Fold the sides inward, then roll tightly from the bottom to enclose the filling.
Grill for Crispness (Optional)
- Heat a grill pan or skillet over medium heat.
- Place the wrap seam-side down and press lightly. Cook for 2–3 minutes until golden.
- Flip and repeat for the other side.
Now that you’ve mastered the basics of assembling these flavorful wraps, let’s explore how to elevate them further. Whether you’re meal prepping for the week or serving a family dinner, these tips will ensure your wraps are always a hit.
Serving Suggestions for Maximum Appeal
Presentation matters just as much as taste when it comes to wraps. Here are some simple yet effective ways to serve your Chicken Avocado Wraps:
- Cut in Half Diagonally: This exposes the colorful layers of chicken, avocado, and cheese, making them visually appetizing. Secure with toothpicks if needed.
- Drizzle with Sauce: Add a zigzag of chipotle mayo, sriracha, or ranch dressing for extra flavor and moisture.
- Pair with Fresh Garnishes: Serve with lime wedges, cilantro sprigs, or pickled jalapeños on the side for customizable heat and acidity.
- Wrap in Parchment Paper: Ideal for packed lunches, this keeps them neat and makes them easy to hold.
For gatherings, arrange the wraps on a platter with small bowls of extra toppings like diced red onions, black beans, or corn salsa for a build-your-own wrap bar.
Common Mistakes and How to Avoid Them
Even simple recipes can go awry. Here’s how to sidestep pitfalls:
- Overfilling the Tortilla
Problem: Too much filling causes spills and breaks the wrap.
Fix: Use no more than 1 cup of total fillings per large tortilla. Layer ingredients thinly and evenly. - Skipping the Grill Step
Problem: Wraps may taste bland or fall apart.
Fix: Grilling for just 2–3 minutes per side melts the cheese and crisps the exterior, enhancing texture. - Using Cold Tortillas
Problem: Stiff tortillas crack when folded.
Fix: Warm them briefly in a microwave (10 seconds) or dry skillet before assembling. - Preparing Avocado Too Early
Problem: Avocado browns and turns mushy.
Fix: Dice it right before assembly and toss with a teaspoon of lemon juice.
8 Perfect Side Dishes to Complement Your Wraps
Round out your meal with these balanced pairings:
- Mexican Street Corn (Elote)
Grilled corn slathered with cotija cheese, chili powder, and lime adds smoky richness. - Quinoa and Black Bean Salad
A protein-packed, fiber-rich side that mirrors the wrap’s fresh flavors. - Sweet Potato Fries
Bake with paprika for a sweet-spicy contrast to the creamy avocado. - Chilled Cucumber Lime Salad
Thinly sliced cucumbers with lime zest and mint offer a refreshing crunch. - Roasted Red Pepper Soup
A warm, velvety companion for cooler days. - Jicama Slaw
Julienned jicama, cabbage, and a citrus vinaigrette lighten the meal. - Guacamole and Tortilla Chips
Double down on avocado with a chunky, homemade guacamole. - Watermelon Feta Salad
Sweet watermelon and salty feta balance the wrap’s savory notes.
Completing our guide to Healthy Chicken Avocado Wraps, this final section covers essential storage techniques, answers to common questions, and pro tips to perfect your wraps every time. Whether you’re meal prepping or serving a crowd, these insights will ensure your wraps stay fresh, flavorful, and hassle-free.
Storage and Reheating Instructions
Proper storage keeps your wraps tasting their best. Follow these guidelines to maintain texture and flavor:
Refrigeration
- Short-Term Storage (Up to 24 Hours):
- Wrap tightly in parchment paper or aluminum foil to prevent drying.
- Place in an airtight container to avoid fridge odors.
- Note: Avocado may darken slightly but remains safe to eat.
- For Longer Freshness (Meal Prep):
- Store components separately: Keep chicken, veggies, and cheese in individual containers.
- Assemble wraps just before eating to prevent sogginess.
Freezing (Not Recommended)
- Why Avoid Freezing:
- Avocado becomes mushy upon thawing.
- Tortillas turn brittle, and lettuce wilts.
- Alternative: Freeze cooked chicken separately for up to 1 month; thaw and assemble fresh.
Reheating Tips
- Grill or Panini Press:
- Reheat wraps seam-side down in a dry skillet over medium heat for 2–3 minutes per side.
- Restores crispness without overcooking fillings.
- Microwave (Quick Fix):
- Remove foil/wrapping and microwave for 30–45 seconds.
- Texture will soften, but flavor remains intact.
Recipe Tips for Customization and Perfection
Tailor your wraps to dietary needs or flavor preferences with these easy tweaks:
Ingredient Swaps
- Protein: Substitute chicken with grilled shrimp, black beans, or tofu for vegetarian options.
- Dairy-Free: Use cashew cream or avocado mash instead of sour cream.
- Low-Carb: Swap tortillas for collard greens or lettuce leaves.
Flavor Boosters
- Spices: Add cumin, smoked paprika, or garlic powder to the chicken.
- Heat: Mix sriracha into the sour cream or add pickled jalapeños.
- Fresh Herbs: Toss in cilantro, dill, or basil for brightness.
Assembly Tricks
- Layer Wisely: Spread sour cream directly on the tortilla first—it acts as a “glue” to hold fillings.
- Double-Wrap: For extra-sturdy wraps, use two overlapping tortillas.
- Prevent Sogginess: Blot diced tomatoes with a paper towel to remove excess moisture.
Frequently Asked Questions (FAQs)
Based on the “People Also Ask” section for this keyword, here are expert answers to common queries:
1. Can I Make These Wraps Ahead of Time?
- Yes, but with caution: Assemble wraps without avocado, store refrigerated, and add avocado just before serving.
2. How Do I Keep the Avocado from Browning?
- Acid is key: Toss diced avocado with lemon or lime juice before adding to wraps.
3. Are These Wraps Gluten-Free?
- With one swap: Use certified gluten-free tortillas (e.g., almond flour or corn-based).
4. What’s the Best Chicken for This Recipe?
- Rotisserie chicken saves time, but homemade grilled chicken offers the best texture.
5. Can I Use Flour Tortillas Instead of Burrito-Sized?
- Yes, but smaller tortillas require less filling to avoid breakage.
6. How Can I Add More Fiber?
- Add-ins: Include black beans, shredded carrots, or whole-grain tortillas.
Conclusion: Why This Recipe Works
Healthy Chicken Avocado Wraps are a triumph of simplicity and nutrition. They’re:
- Quick: Ready in 20 minutes.
- Adaptable: Fit for keto, gluten-free, or vegetarian diets.
- Portable: Ideal for lunches, picnics, or post-workout fuel.
By mastering the prep, avoiding common pitfalls, and experimenting with flavors, you’ll have a go-to recipe that never gets boring. Pro tip: Double the chicken and use leftovers for salads or grain bowls!
LSI/NLP Keywords: meal prep chicken wraps, how to store avocado wraps, gluten-free wrap options, make-ahead lunch wraps, reheating grilled wraps, high-protein lunch ideas, healthy wrap variations, no-soggy wrap tips
Healthy Chicken Avocado Wraps
Ingredients
For the Wraps:
- 2 chicken breasts cooked and sliced
- 6 large burrito-sized tortillas
- 3 cups lettuce chopped
- 1 large tomato diced
- 1 avocado diced
- 1 cup sour cream
- 3 cups yellow sharp cheddar cheese grated
For Cooking the Chicken:
- Salt and black pepper to taste
- 2 tablespoons olive oil
Instructions
- Cook the Chicken
- Rinse and pat dry the chicken breasts. Season both sides with salt and pepper.
- Heat a pan over medium-high heat and add olive oil.
- Place the chicken in the skillet, cover, and cook for 5–7 minutes on one side. Flip and cook for another 5 minutes, or until the internal temperature reaches 165–170°F.
- Remove from the pan and let rest before slicing into thin strips.
- Prepare the Ingredients
- Slice the cooked chicken.
- Chop the lettuce, dice the tomato and avocado, and grate the cheddar cheese.
- Assemble the Wraps
- Lay a tortilla flat on a plate.
Layer with:
- ½ cup chopped lettuce
- ¼ cup diced tomatoes
- A few pieces of diced avocado
- 1 tablespoon sour cream
- A few slices of cooked chicken
- ¼ cup grated cheddar cheese
- Wrap tightly, folding the edges in like an envelope to secure the filling. Repeat for remaining wraps.
- Grill the Wraps
- Preheat a dry pan over medium-high heat.
- Place the wraps seam-side down in the pan and grill for 2–3 minutes until golden brown and crispy.
- Flip and grill the other side for another 2–3 minutes.
- Serve and Enjoy
- Serve immediately for the best taste with warm, melted cheese.
- Notes
- Grilled Wraps: Grilling adds a crispy texture and enhances flavor.
- Serving Suggestion: Wrap individually in foil or a resealable bag for a convenient lunch.
- Filling Tips: Avoid overfilling to ensure easy wrapping.
- Chicken Options: Use grilled, pan-seared, shredded, or rotisserie chicken.
- Ingredient Variations: Customize with peppers, onions, or bacon.
- Sour Cream Tip: Spreading sour cream inside helps blend flavors; you can also serve it on the side.
- Tortilla Alternatives: Use smaller tortillas and enjoy them taco-style.
- Storage Tips
- Refrigeration: Store wraps in the fridge for a few hours. The cheese won’t stay melted, but they’ll still taste great. Avoid refrigerating overnight to prevent sogginess.
- Freezing: Not recommended.
