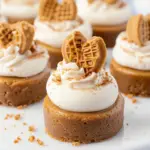
Imagine biting into a creamy, no-bake cheesecake infused with the rich, spiced flavor of Biscoff cookie butter, all nestled on a buttery cookie crust and finished with a silky drizzle of melted cookie butter. These Mini Biscoff Cheesecakes are the ultimate indulgence for dessert lovers, combining the irresistible taste of Lotus Biscoff cookies with the smooth texture of cheesecake. Perfect for parties, holidays, or anytime you crave a bite-sized treat, they require no oven time—just a few simple steps and a long chill in the fridge.
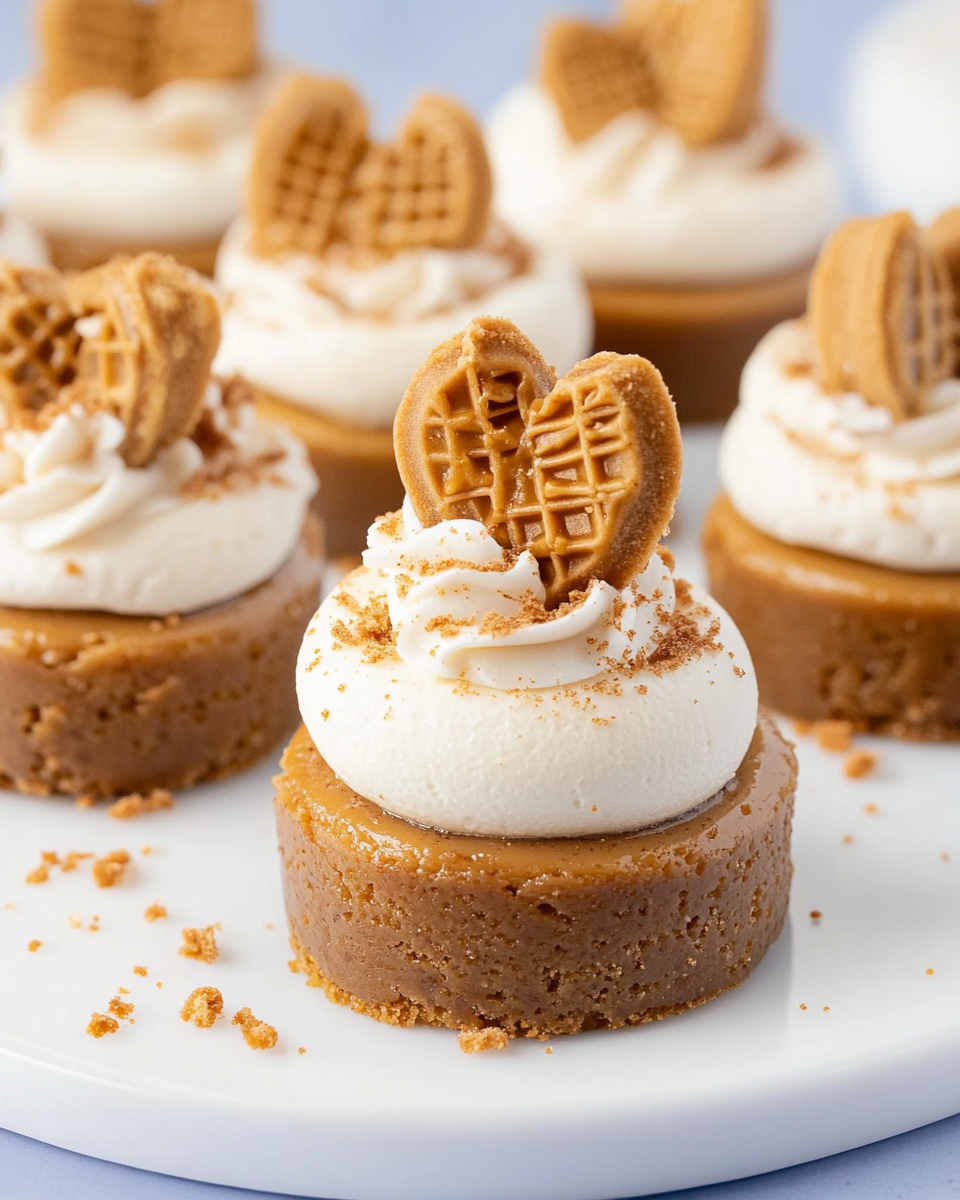
What makes these mini cheesecakes stand out is their decadent yet easy preparation. The crust is made entirely from Biscoff cookie crumbs, eliminating the need for graham crackers, while the filling blends cream cheese and cookie butter for a luscious, velvety consistency. Topped with whipped cream and extra cookie crumbles, each bite delivers a perfect balance of crunch and creaminess. Whether you’re a seasoned baker or a beginner, this recipe is foolproof and guaranteed to impress.
Preparation Phase & Essential Tools
Before diving into the recipe, gather the right tools to ensure smooth execution. Here’s what you’ll need:
- Mini Cheesecake Pan or Muffin Tin – A non-stick mini cheesecake pan with removable bottoms is ideal, but a standard muffin tin lined with cupcake papers works too.
- Electric Mixer – A hand mixer or stand mixer ensures the filling is lump-free and airy.
- Mixing Bowls – One large bowl for the filling and a medium bowl for the crust.
- Piping Bag & Star Tip – A Wilton 1M tip creates elegant whipped cream swirls, though a spoon works for a rustic look.
- Measuring Tools – Measuring cups and spoons for precision.
- Spatula – To scrape every bit of the filling.
Why These Tools Matter
Using a mini cheesecake pan ensures uniform shapes and easy removal, while an electric mixer incorporates air into the filling for a light, mousse-like texture. A piping bag isn’t mandatory, but it elevates presentation.
Preparation Tips for Success
- Room-Temperature Ingredients – Softened cream cheese blends smoothly, preventing lumps.
- Chill the Crust – Refrigerate the crust for 10 minutes before adding the filling to prevent sogginess.
- Whip Cream Separately – For the fluffiest texture, whip the heavy cream to stiff peaks before folding it in.
Ingredients List
For the Biscoff Cookie Crust
- 2 cups Biscoff cookie crumbs – Pulse whole cookies in a food processor or buy pre-crushed.
- 2 tablespoons granulated sugar – Enhances the caramelized flavor of the cookies.
- 6 tablespoons salted butter, melted – Binds the crust and adds richness.
For the Cheesecake Filling
- 16 oz cream cheese, softened – Full-fat for the creamiest texture.
- 1 ¾ cups powdered sugar – Dissolves easily for a smooth filling.
- 1 cup Biscoff spread – The star ingredient; use creamy, not crunchy.
- 2 teaspoons vanilla extract – Balances the sweetness.
- 1 cup heavy cream – Whipped to stiff peaks for volume.
For the Whipped Cream Topping
- ¾ cup heavy cream – Cold for best whipping results.
- 2 tablespoons powdered sugar – Sweetens lightly.
- ½ teaspoon vanilla extract – Adds depth.
For Garnish
- ¾ cup Biscoff spread, melted – For drizzling.
- 2 tablespoons Biscoff cookie crumbs – Extra crunch.
- 12 Biscoff cookies, halved – Visual appeal and texture.
Step-by-Step Instructions
Make the Biscoff Cookie Crust
- In a mixing bowl, combine Biscoff cookie crumbs, granulated sugar, and melted butter until the mixture resembles wet sand.
- Press 1 tablespoon of the mixture into each cup of the mini cheesecake pan, using the back of a spoon to compact it firmly.
- Chill for 10 minutes to set.
Prepare the Cheesecake Filling
- In a large bowl, beat cream cheese, powdered sugar, Biscoff spread, and vanilla extract with an electric mixer until smooth.
- In a separate bowl, whip 1 cup heavy cream to stiff peaks.
- Gently fold the whipped cream into the cream cheese mixture until fully combined.
Assemble and Chill
- Transfer the filling to a piping bag (or use a spoon) and pipe into the prepared crusts, filling just above the rim.
- Refrigerate for at least 12 hours, or overnight, to set completely.
Once your Mini Biscoff Cheesecakes have set overnight, it’s time to add the finishing touches and serve them with flair. These no-bake desserts are versatile enough for casual gatherings or elegant occasions, but presentation and pairing can elevate them further. Below, we’ll explore ideal serving styles, pitfalls to avoid, and complementary dishes that enhance their cookie butter richness.
Serving Suggestions
These mini cheesecakes shine when presented thoughtfully. Here are some ways to make them stand out:
- Platter Presentation: Arrange them on a chilled marble slab or cake stand with extra Biscoff cookie halves scattered around for visual appeal.
- Drizzle Variations: Swap the melted Biscoff spread for chocolate ganache or caramel sauce for a twist.
- Individual Servings: Place each cheesecake on a small dessert plate with a dusting of cocoa powder or crushed cookies.
- Temperature Tip: Serve straight from the fridge—the cooler temperature highlights the creamy texture.
For special occasions, pair them with:
- Espresso or Coffee: The bitterness balances the sweetness.
- Vanilla Ice Cream: Adds a creamy contrast.
Common Mistakes to Avoid
Even simple recipes can go awry. Here’s how to sidestep pitfalls:
1. Runny Filling
- Cause: Overmixing after adding the heavy cream or using warm cream cheese.
- Fix: Whip the cream separately to stiff peaks, then fold gently. Ensure all ingredients are cold or room temperature (not warm).
2. Crumbly or Soggy Crust
- Cause: Undermixing the crust (won’t hold shape) or skipping the chilling step before filling (leads to sogginess).
- Fix: Press the crust firmly and chill for 10 minutes before adding filling.
3. Cracks on Top
- Cause: Overbeating the filling or rushing the chill time.
- Fix: Mix just until combined, and refrigerate for the full 12 hours.
4. Sticking to the Pan
- Cause: Not using liners or greasing the pan adequately.
- Fix: If using a muffin tin, line with parchment cupcake liners for easy removal.
How to Perfect the Recipe
For flawless results every time:
- Weigh Ingredients: Use a kitchen scale for precise measurements, especially for cookie crumbs and powdered sugar.
- Pipe Neatly: A star-tipped piping bag gives the whipped cream a professional finish.
- Garnish Last: Add toppings like melted Biscoff drizzle and cookie crumbs right before serving to maintain texture.
Side Dish Recommendations
Balance the richness of these cheesecakes with contrasting flavors and textures. Here are 8 pairings:
- Fresh Berries – Strawberries, raspberries, or blackberries cut through the sweetness.
- Salted Caramel Sauce – A drizzle adds a salty-sweet dimension.
- Vanilla Bean Ice Cream – Creamy and cooling alongside the dense cheesecake.
- Chai Latte – Warm spices echo the cinnamon notes in Biscoff.
- Dark Chocolate Shavings – Bittersweet chocolate contrasts the cookie butter’s sweetness.
- Whipped Mascarpone – Lighter than whipped cream, with a subtle tang.
- Fruit Compote – Blueberry or raspberry compote adds a tart counterpoint.
- Nutty Crunch – Toasted chopped pecans or almonds for texture.
Why These Pairings Work
The caramelized, spiced flavor of Biscoff pairs well with tart fruits, bitter chocolate, and creamy accompaniments. Warm beverages like coffee or chai enhance the dessert’s cozy undertones, while cold ice cream creates a temperature contrast.
Creating flawless Mini Biscoff Cheesecakes requires attention to detail. Here are expert tips to ensure success:
- For a Smoother Filling: Ensure your cream cheese is fully softened to room temperature before mixing. Cold cream cheese can create lumps in your batter.
- Proper Crust Texture: When making the crust, aim for a consistency similar to wet sand. If the mixture feels too dry, add an extra tablespoon of melted butter.
- Avoid Overmixing: Once you add the whipped cream to the filling, fold gently with a spatula until just combined. Overmixing can deflate the airiness.
- Chill Time Matters: While the cheesecakes will set after 4-6 hours, an overnight chill (12 hours) ensures the firmest texture and best flavor development.
- Easy Removal Trick: If using a muffin tin, run a thin knife around the edges before lifting the cheesecakes out. For non-stick pans, a quick twist usually releases them cleanly.
Storage and Reheating Instructions
Proper storage keeps your cheesecakes fresh and delicious:
Refrigeration
- Store in an airtight container with parchment paper between layers to prevent sticking.
- Consume within 3-4 days for optimal freshness.
- For best texture, let sit at room temperature for 5 minutes before serving.
Freezing for Longer Storage
- Individually wrap cheesecakes in plastic wrap, then place in a freezer-safe bag or container.
- Freeze for up to 1 month.
- Thaw overnight in the refrigerator before serving.
Important Notes
- Avoid freezing decorated cheesecakes (with whipped cream) as the topping may separate upon thawing.
- Do not microwave frozen cheesecakes—thaw slowly to maintain texture.
Frequently Asked Questions
Can I use a different cookie for the crust?
Yes, graham crackers or digestive biscuits work well, though the flavor will differ from the classic Biscoff taste. Adjust sugar slightly as these cookies are less sweet.
Why did my cheesecakes turn out dense?
This usually happens from overmixing the filling or using cold cream cheese. Always mix just until combined and ensure ingredients are at room temperature.
Can I make these vegan?
Substitute with vegan cream cheese, coconut cream (for whipping), and a plant-based butter alternative. Check that your Biscoff spread is vegan-friendly (most are).
How do I prevent the whipped cream from deflating?
Use chilled bowls and cold heavy cream. Whip just until stiff peaks form—overwhipping can cause separation.
Can I make one large cheesecake instead?
Absolutely. Use a 6-inch springform pan and increase the chill time to at least 24 hours for proper setting.
My cheesecakes are too sweet. How can I balance this?
Reduce the powdered sugar in the filling by 1/4 cup, or add a pinch of sea salt to the crust mixture to offset the sweetness.
Conclusion
These Mini Biscoff Cheesecakes offer the perfect combination of creamy, crunchy, and caramelized flavors in a convenient no-bake format. Whether you’re preparing them for a special occasion or as a treat for yourself, their make-ahead convenience and crowd-pleasing taste make them a standout dessert.
The key to success lies in:
- Proper ingredient temperatures
- Gentle mixing techniques
- Allowing adequate setting time
- Thoughtful presentation and pairing
With these tips and techniques, you’ll create professional-quality cheesecakes that showcase the unique speculoos flavor of Biscoff in every bite. Store them properly to maintain freshness, and don’t hesitate to experiment with different toppings and variations to make the recipe your own.
Mini Biscoff Cheesecakes
Ingredients
For the Biscoff Cookie Crust:
- 2 cups Biscoff cookie crumbs
- 2 tablespoons granulated sugar
- 6 tablespoons salted butter melted
For the Biscoff Cheesecake Filling:
- 16 oz cream cheese room temperature
- 1 ¾ cups powdered sugar
- 1 cup Biscoff spread cookie butter
- 2 teaspoons vanilla extract
- 1 cup heavy cream
For the Whipped Cream:
- ¾ cup heavy cream
- 2 tablespoons powdered sugar
- ½ teaspoon vanilla extract
For Topping:
- ¾ cup Biscoff spread cookie butter, melted
- 2 tablespoons Biscoff cookie crumbs
- 12 Biscoff cookies halved
Instructions
- Make the Biscoff Cookie Crust
- In a mixing bowl, combine Biscoff cookie crumbs, granulated sugar, and melted butter.
- Portion about 1 tablespoon of the crust mixture into each cup of a mini cheesecake pan.
- Press firmly to create an even crust layer. Set aside.
- Prepare the Cheesecake Filling
- In a large mixing bowl, beat cream cheese, powdered sugar, Biscoff spread, and vanilla extract until smooth.
- Add heavy cream and continue beating on medium-high speed until the filling thickens and becomes fluffy.
- Assemble and Chill
- Transfer the cheesecake filling to a piping bag and pipe onto each prepared crust, allowing the mixture to rise slightly above the rim.
- Refrigerate for at least 12 hours, or overnight, until set.
- Once firm, carefully remove the cheesecakes from the pan.
- Make the Whipped Cream
- In a separate bowl, whip heavy cream, powdered sugar, and vanilla extract until medium-stiff peaks form.
- Transfer to a piping bag fitted with a Wilton 1M tip (or similar).
- Decorate and Serve
- Microwave the Biscoff spread for 30 seconds until melted, then drizzle over each cheesecake.
- Pipe a swirl of whipped cream on top.
- Sprinkle with cookie crumbs and top with half a Biscoff cookie for garnish.
- Notes
- Store in an airtight container in the fridge for up to 3 days. Serve chilled.
- If you don’t have a mini cheesecake pan, a standard muffin tin with cupcake liners works well for easy removal.
