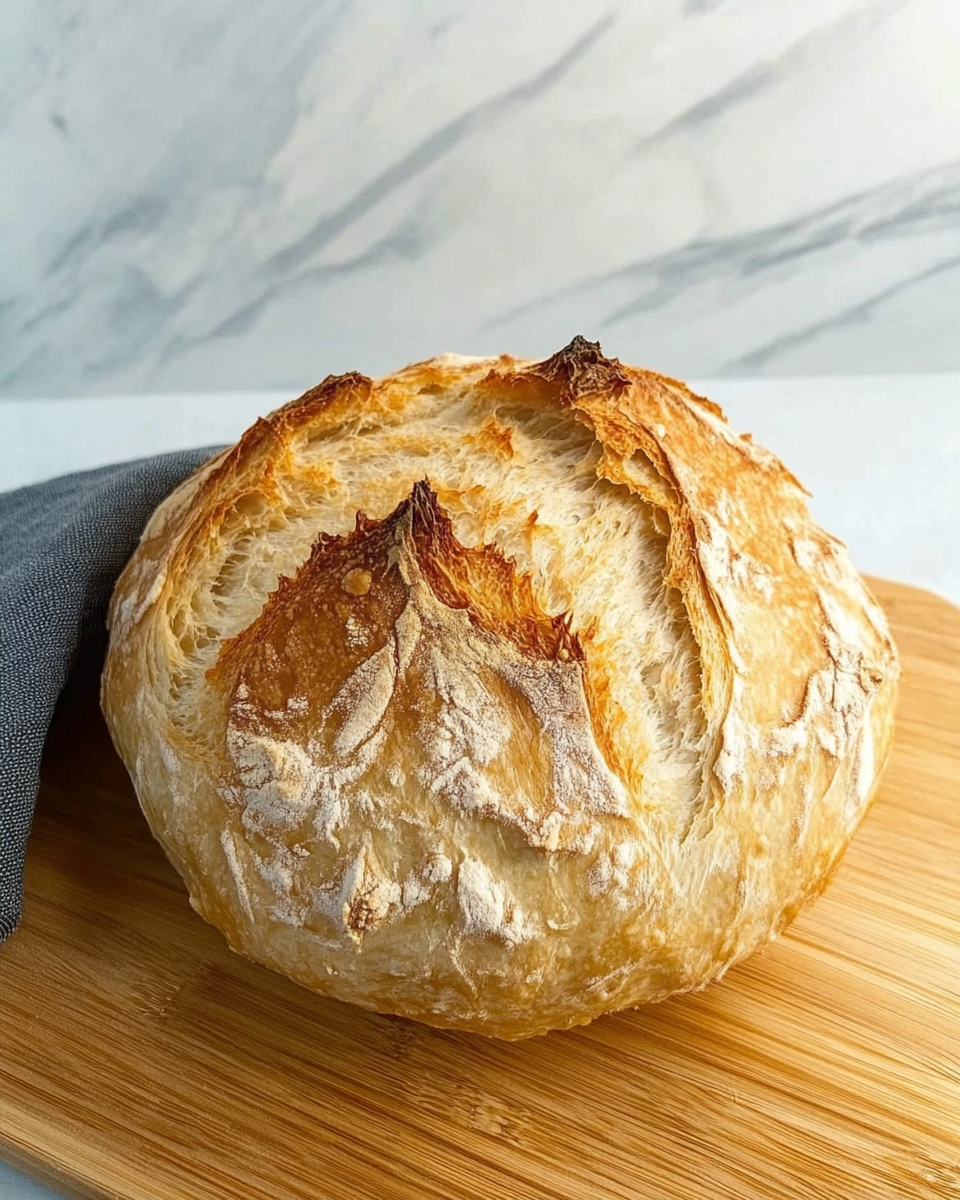
There’s something undeniably comforting about the aroma of freshly baked bread filling your home. Quick and Easy No-Knead Bread brings that joy to your kitchen with minimal effort and maximum reward. This recipe is a game-changer for anyone who loves the idea of homemade bread but doesn’t want to spend hours kneading or mastering complex techniques. With just four simple ingredients—flour, yeast, salt, and water—you can create a loaf with a crispy, golden crust and a soft, chewy interior that rivals any artisan bakery. Whether you’re a seasoned baker or a complete beginner, this recipe is designed to make you feel like a bread-making pro. The best part? It requires no special skills or equipment—just a little patience while the dough rises. Let’s walk through the tools, ingredients, and steps to make this no-fuss bread a reality.
Preparation Phase & Tools to Use
Before diving into the recipe, it’s important to gather all the necessary tools and ingredients. Proper preparation ensures a smooth baking process and helps you avoid last-minute hiccups. Here’s what you’ll need to get started:
Essential Tools and Equipment
- Dutch Oven: This heavy-duty pot with a lid is the secret to achieving a crispy crust and even baking. It traps steam during the baking process, which is essential for creating that bakery-quality texture.
- Mixing Bowl: A large bowl is necessary for combining your ingredients and allowing the dough to rise.
- Wooden Spoon or Spatula: These tools are perfect for mixing the dough without overworking it, which helps maintain its light and airy texture.
- Parchment Paper: This makes transferring the dough into the hot Dutch oven much easier and prevents sticking.
- Dough Scraper or Large Knife: Use this to shape the dough and move it onto the parchment paper.
- Damp Cloth: Covering the dough with a damp cloth while it rises keeps it moist and prevents it from drying out.
- Wire Rack: After baking, cooling the bread on a wire rack prevents the bottom from becoming soggy.
Importance of Each Tool
Each tool plays a critical role in the success of your no-knead bread. The Dutch oven is particularly important because it mimics the environment of a professional bread oven, trapping steam to create a crispy crust. A wooden spoon ensures the dough isn’t overmixed, which could result in a dense loaf. Parchment paper not only makes handling the dough easier but also prevents it from sticking to the Dutch oven. A damp cloth keeps the dough hydrated during the rising process, and a wire rack ensures even cooling.
Preparation Tips
- Use warm water (not hot) to activate the yeast properly. Water that’s too hot can kill the yeast, while water that’s too cold won’t activate it.
- Measure your ingredients accurately. Baking is a science, and even small deviations can affect the final result.
- Choose a draft-free spot for the dough to rise. A turned-off oven is an ideal location because it’s warm and free from drafts.
- Preheat your Dutch oven. This step is crucial for achieving a good rise and a crispy crust.
Ingredients
- 3 cups bread flour: Bread flour has a higher protein content than all-purpose flour, which gives the bread its structure and chewiness.
- 1 packet (2 teaspoons) rapid rise yeast: This type of yeast works quickly, making it perfect for a no-knead recipe.
- 1 ½ teaspoons salt: Salt enhances the flavor of the bread and helps control the yeast’s activity.
- 1 ½ cups warm water: Water binds the ingredients together and activates the yeast.
Step-by-Step Directions
- Mix the Dough: In a large mixing bowl, combine the flour, yeast, and salt. Add the warm water and mix with a wooden spoon or spatula until a sticky dough forms. Don’t worry if the dough looks messy—this is normal!
- Let the Dough Rise: Cover the bowl with a damp cloth and let the dough rest in a draft-free place for 2-3 hours, or until it doubles in size.
- Preheat the Oven: A few minutes before the rising time is complete, preheat your oven to 450°F (232°C). Place the Dutch oven (with the lid on) in the oven to heat while it preheats.
- Shape the Dough: Lightly sprinkle flour on your countertop and turn the dough out onto it. Gently fold the sides of the dough inward about 6 times to form a round loaf. If the dough sticks to your hands, dust them lightly with flour.
- Transfer to Parchment Paper: Use a dough scraper or large knife to transfer the dough onto a piece of parchment paper, leaving enough paper hanging over the sides to help lift the bread later.
- Bake the Bread: Carefully remove the Dutch oven from the oven (it will be very hot!). Using the parchment paper, transfer the dough into the Dutch oven. Cover with the lid and bake for 30 minutes. Remove the lid and bake for an additional 15 minutes, or until the bread is golden brown.
- Cool and Serve: Remove the bread from the Dutch oven using the parchment paper and let it cool on a wire rack before slicing.
Now that you’ve mastered the art of making Quick and Easy No-Knead Bread, it’s time to explore how to serve it, avoid common pitfalls, and pair it with delicious side dishes. This versatile bread is more than just a standalone treat—it can elevate any meal, from casual weeknight dinners to special occasions. Let’s dive into the best ways to enjoy your homemade loaf and ensure it turns out perfectly every time.
Serving Suggestions
This no-knead bread is incredibly versatile and pairs well with a variety of dishes. Here are some creative ways to serve it:
- Warm with Olive Oil and Balsamic Vinegar: Slice the bread while it’s still warm, drizzle with high-quality olive oil, and dip it into balsamic vinegar for a simple yet satisfying appetizer.
- Sandwiches: Use thick slices to make hearty sandwiches. The chewy texture and crispy crust hold up well to fillings like roasted vegetables, deli meats, or cheese.
- Soup Companion: Serve alongside your favorite soups, such as tomato basil, butternut squash, or chicken noodle. The bread is perfect for soaking up every last bit of broth.
- Cheese Board: Slice the bread and arrange it on a cheese board with a selection of cheeses, cured meats, olives, and fruits for a rustic appetizer.
- Garlic Bread: Brush slices with garlic butter, toast them in the oven, and sprinkle with parsley for a flavorful side dish.
Common Mistakes to Avoid & How to Perfect the Recipe
Even though this recipe is simple, there are a few common mistakes that can affect the final result. Here’s how to avoid them and ensure your bread turns out perfectly every time:
- Over-flouring the Dough: While it’s tempting to add extra flour to make the dough less sticky, this can result in a dense loaf. Use just enough flour to handle the dough without overdoing it.
- Skipping the Preheating Step: Preheating the Dutch oven is crucial for creating steam, which gives the bread its crispy crust. Always heat the Dutch oven before adding the dough.
- Cutting the Bread Too Soon: It’s tempting to slice into the bread right out of the oven, but this can lead to a gummy texture. Let the bread cool completely on a wire rack before slicing.
- Using Cold Water: Cold water won’t activate the yeast properly, resulting in a dense loaf. Always use warm water (around 110°F or 43°C) to ensure the yeast is active.
- Not Letting the Dough Rise Long Enough: Patience is key. If the dough hasn’t doubled in size, it won’t have the right texture. Give it the full 2-3 hours to rise.
Side Dish Recommendations
Pairing your no-knead bread with the right side dishes can turn it into a complete meal. Here are eight delicious options to consider:
- Tomato Basil Soup: A classic pairing that’s both comforting and flavorful. The bread is perfect for dipping into the rich, creamy soup.
- Garlic Butter Shrimp: The bread’s chewy texture makes it ideal for soaking up the garlicky butter sauce.
- Roasted Vegetables: Serve the bread alongside a tray of roasted vegetables like carrots, Brussels sprouts, and sweet potatoes for a healthy and satisfying meal.
- Cheese Board: Create a charcuterie board with a variety of cheeses, cured meats, nuts, and fruits. The bread adds a rustic touch to the spread.
- Spinach Artichoke Dip: This creamy, cheesy dip is a crowd-pleaser and pairs perfectly with slices of warm bread.
- Beef Stew: A hearty stew with tender beef and vegetables is even better with a slice of crusty bread on the side.
- Caesar Salad: Add a slice of bread to a fresh Caesar salad for a light yet satisfying meal.
- Hummus: For a Mediterranean-inspired snack, serve the bread with hummus and a drizzle of olive oil.
Tips for Perfecting the Recipe
- Experiment with Flavors: Add herbs like rosemary or thyme to the dough for a fragrant twist. You can also mix in ingredients like garlic, olives, or cheese for added flavor.
- Adjust Baking Time: Oven temperatures can vary, so keep an eye on the bread during the final 15 minutes of baking. If it’s browning too quickly, reduce the temperature slightly.
- Try Overnight Rising: For a deeper flavor, let the dough rise overnight in the refrigerator. This slow fermentation process enhances the bread’s taste and texture.
In this final section, we’ll explore additional tips to perfect your Quick and Easy No-Knead Bread, discuss how to store and reheat it, answer frequently asked questions, and wrap up with a conclusion that ties everything together. By the end, you’ll have all the knowledge you need to make this recipe a staple in your kitchen.
Recipe Tips
While the recipe is straightforward, a few extra tips can help you achieve even better results:
- Experiment with Flours: While bread flour is ideal for its high protein content, you can experiment with other flours. Try using a mix of whole wheat and bread flour for a nuttier flavor, or substitute up to 1 cup of all-purpose flour if needed.
- Add-Ins for Variety: Customize your bread by incorporating add-ins like chopped herbs (rosemary, thyme, or oregano), minced garlic, grated cheese, or even sun-dried tomatoes. Fold these into the dough during the shaping step.
- Overnight Fermentation: For a deeper, more complex flavor, let the dough rise overnight in the refrigerator. This slow fermentation process enhances the bread’s taste and texture. Simply cover the bowl with plastic wrap and let it rest in the fridge for 12-18 hours before shaping and baking.
- Check for Doneness: To ensure your bread is fully baked, tap the bottom—it should sound hollow. If you’re unsure, use a food thermometer to check the internal temperature, which should be around 200°F (93°C).
Storage and Reheating Instructions
Proper storage ensures your bread stays fresh and delicious for as long as possible:
- Short-Term Storage: Store the bread at room temperature in a paper bag or wrapped in a clean kitchen towel for up to 2 days. Avoid plastic bags, as they can trap moisture and make the crust soft.
- Long-Term Storage: To keep the bread fresh for longer, slice it and freeze it in an airtight container or freezer bag. It will stay good for up to 3 months.
- Reheating: To restore the bread’s freshness, preheat your oven to 350°F (175°C). Wrap the bread in aluminum foil and warm it for 10-15 minutes. For a crispier crust, remove the foil during the last 5 minutes of reheating.
FAQs
Here are answers to some of the most common questions about no-knead bread:
- Can I use all-purpose flour instead of bread flour?
Yes, you can use all-purpose flour, but the bread may have a slightly less chewy texture. Bread flour’s higher protein content gives the loaf its signature structure. - What if I don’t have a Dutch oven?
If you don’t have a Dutch oven, you can use a heavy baking sheet or oven-safe pot. Cover the dough with a metal bowl or aluminum foil to trap steam during the first 30 minutes of baking. - Can I make this recipe gluten-free?
While you can substitute gluten-free flour, the results may vary. Look for a gluten-free flour blend designed for bread baking, and consider adding xanthan gum to improve texture. - How do I know when the bread is done?
The bread is done when it has a golden brown crust and sounds hollow when tapped on the bottom. You can also check the internal temperature with a food thermometer—it should read around 200°F (93°C). - Can I double the recipe?
Yes, you can double the ingredients to make two loaves. However, you’ll need to bake them separately unless you have two Dutch ovens.
Conclusion
Quick and Easy No-Knead Bread is a testament to the beauty of simplicity. With just four basic ingredients and minimal effort, you can create a loaf that’s as impressive as it is delicious. Whether you’re serving it warm with olive oil, using it to make sandwiches, or pairing it with your favorite soup, this bread is sure to become a staple in your kitchen.
The recipe’s versatility makes it perfect for beginners and experienced bakers alike. You can customize it with herbs, cheese, or other add-ins, or stick to the classic version for a timeless treat. By following the tips and avoiding common mistakes, you’ll achieve bakery-quality results every time.
So, roll up your sleeves, gather your ingredients, and give this recipe a try. Once you taste the crispy crust and chewy interior of your homemade bread, you’ll understand why this recipe has become a favorite for so many. Happy baking!
Quick and Easy No-Knead Bread
Ingredients
- 3 cups bread flour
- 1 packet 2 teaspoons rapid rise yeast
- 1 ½ teaspoons salt
- 1 ½ cups warm water
Instructions
Mix the Dough:
- In a large mixing bowl, combine the flour, rapid rise yeast, and salt.
- Add the warm water and mix with a wooden spoon or spatula until a sticky dough forms. (It will look messy—this is normal!)
Let the Dough Rise:
- Cover the bowl with a damp cloth and let the dough rest in a draft-free place (like a turned-off oven) for 2-3 hours, or until it doubles in volume.
Preheat the Oven:
- A few minutes before the rising time is complete, preheat your oven to 450°F (232°C).
- Place a Dutch oven (with the lid on) in the oven to heat while it preheats.
Shape the Dough:
- Lightly sprinkle flour on your countertop and turn the dough out onto it.
- Gently fold the sides of the dough inward about 6 times to form a round loaf. If the dough sticks to your hands, dust them lightly with flour.
Transfer to Parchment Paper:
- Use a dough scraper or large knife to transfer the dough onto a piece of parchment paper, leaving enough paper hanging over the sides to help lift the bread later.
Bake the Bread:
- Carefully remove the Dutch oven from the oven (it will be very hot!).
- Using the parchment paper, transfer the dough into the Dutch oven. Cover with the lid.
- Bake for 30 minutes with the lid on.
- Remove the lid and bake for an additional 15 minutes, or until the bread is golden brown.
Cool and Serve:
- Remove the bread from the Dutch oven using the parchment paper and let it cool on a wire rack before slicing.
- Notes
- The dough will be sticky—that’s completely normal! Avoid over-flouring.
- Be cautious when handling the Dutch oven, as it will be extremely hot.
