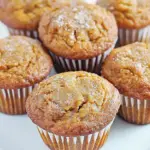
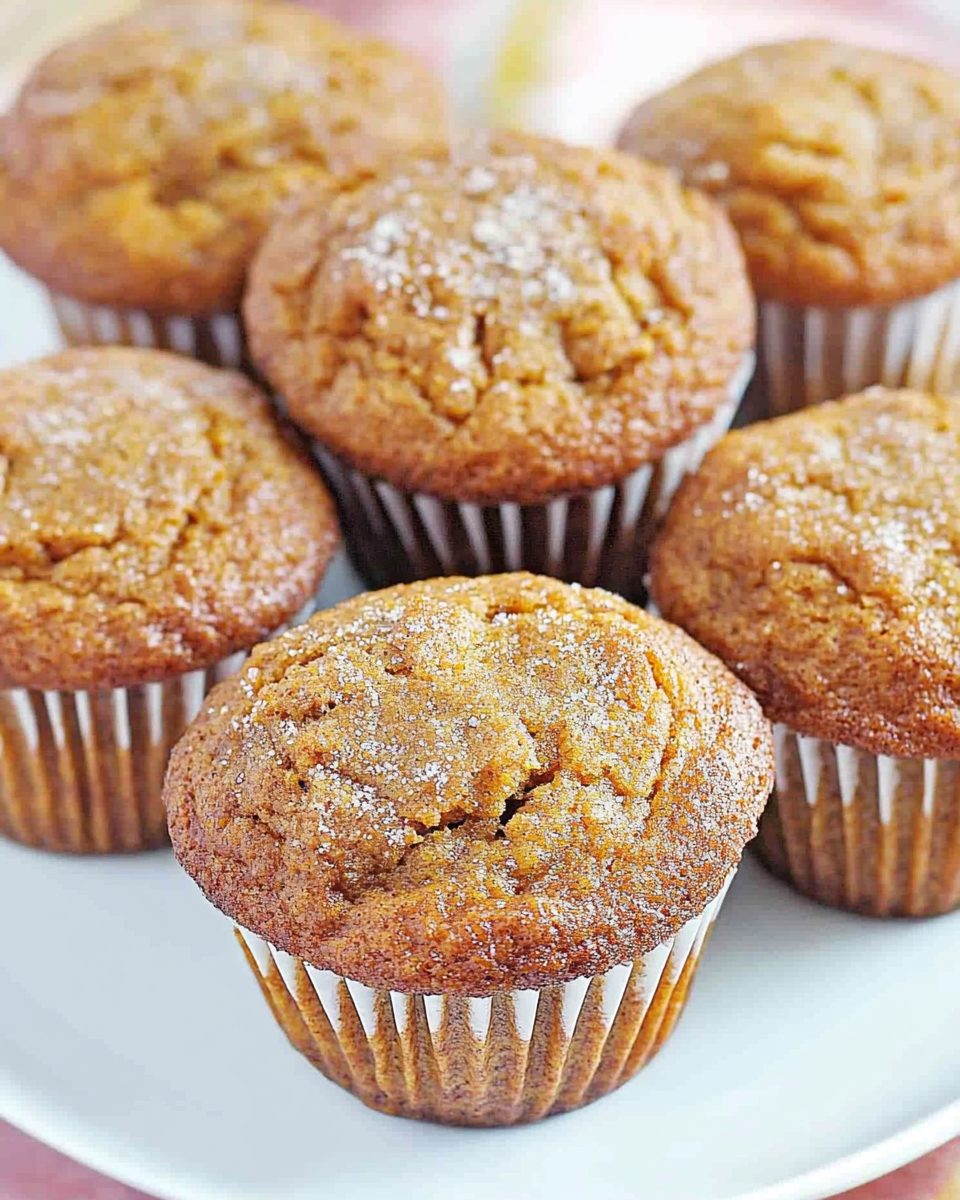
Nothing captures the essence of fall quite like a batch of freshly baked homemade pumpkin muffins. These moist, tender muffins are infused with warm spices and crowned with a crisp cinnamon-sugar topping, making them irresistible for breakfast, snacks, or dessert. What sets this recipe apart is its simplicity—no fancy techniques or hard-to-find ingredients, just straightforward, foolproof baking that yields bakery-quality results. Whether you’re a seasoned baker or a beginner, these muffins will become a seasonal staple in your kitchen.
Preparation Phase & Tools to Use
Before diving into the recipe, gather the right tools to ensure success:
- Mixing Bowls – Use one large bowl for wet ingredients and a smaller one for dry ingredients to streamline the process.
- Stand Mixer or Hand Whisk – A mixer ensures a smooth, lump-free batter, but a whisk works just fine if you prefer hand-mixing.
- Muffin Tin – A standard 12-cup tin is ideal; if making a full batch (18 muffins), bake in two rounds or use a second tin.
- Paper Liners or Nonstick Spray – Liners prevent sticking and make cleanup effortless.
- Measuring Cups and Spoons – Precision matters in baking, especially for leavening agents like baking powder and soda.
- Cooling Rack – Essential for stopping the cooking process and preventing soggy bottoms.
Why These Tools Matter
Using a stand mixer guarantees even blending of the wet ingredients, while paper liners keep the muffins intact and portable. A cooling rack allows air circulation, preventing condensation that can make muffins gummy.
Preparation Tips for Perfect Muffins
- Room-Temperature Eggs – They incorporate more smoothly into the batter than cold eggs.
- Don’t Overmix – Stir the batter just until the flour disappears to avoid dense, tough muffins.
- Even Portioning – A cookie scoop or ice cream scoop ensures uniform muffin size and even baking.
- Preheat Thoroughly – A fully heated oven (350°F) ensures the muffins rise properly.
Ingredients List
Dry Ingredients
- 1 ½ cups all-purpose flour – Spoon and level the flour to avoid packing too much into the cup.
- 1 teaspoon baking powder – Provides lift for a fluffy texture.
- ½ teaspoon baking soda – Reacts with the pumpkin’s acidity for added rise.
- ½ teaspoon salt – Enhances the overall flavor.
- 1 teaspoon pumpkin pie spice – A blend of cinnamon, ginger, nutmeg, and cloves.
Wet Ingredients
- 1 (15 oz) can pure pumpkin puree – Not pumpkin pie filling, which contains added sugars and spices.
- ⅓ cup vegetable oil – Keeps the muffins moist; can substitute melted coconut oil.
- 2 large eggs – Binds the ingredients and adds structure.
- 1 ¼ cups granulated sugar – Adjust slightly for sweetness preference.
Topping
- 1 tablespoon sugar + 1 teaspoon cinnamon – Creates a sweet, crunchy crust.
Step-by-Step Instructions
- Preheat the Oven – Set to 350°F (175°C) and line muffin tins with paper liners.
- Whisk Dry Ingredients – In a small bowl, combine flour, baking powder, baking soda, salt, and pumpkin pie spice.
- Mix Wet Ingredients – In a large bowl or stand mixer, blend pumpkin puree, oil, eggs, and sugar until smooth.
- Combine Wet and Dry – Gently fold the dry ingredients into the wet mixture until just incorporated.
- Prepare Topping – Stir together the remaining sugar and cinnamon in a small dish.
- Fill Muffin Cups – Divide the batter evenly among the liners, filling each ⅔ full. Sprinkle with cinnamon sugar.
- Bake – Place in the oven for 20–25 minutes, until a toothpick inserted in the center comes out clean.
- Cool – Let muffins rest in the pan for 5 minutes, then transfer to a wire rack to cool completely.
Pro Tip: For taller, domed muffins, let the batter sit for 15 minutes before baking. This allows the leavening agents to activate.
Freshly baked pumpkin muffins are delicious on their own, but pairing them with complementary flavors elevates them into a memorable experience. Here are some serving ideas:
- Whipped Honey Butter – A creamy blend of softened butter, honey, and a pinch of cinnamon enhances the muffins’ warmth.
- Maple Glaze Drizzle – Mix powdered sugar with a splash of maple syrup and milk for a sweet, autumnal finish.
- Cream Cheese Spread – A tangy contrast to the muffins’ sweetness; add a dash of vanilla for extra flavor.
- Warm Beverages – Serve with spiced chai tea, pumpkin spice latte, or hot apple cider for a cozy pairing.
- Yogurt & Fruit – A dollop of Greek yogurt and fresh berries balance the muffins’ richness.
For special occasions, arrange them on a wooden board with candied pecans and dried cranberries for a rustic fall display.
Common Mistakes & How to Avoid Them
Even experienced bakers can encounter pitfalls when making pumpkin muffins. Here’s how to prevent them:
1. Overmixing the Batter
- Problem: Dense, tough muffins from overdeveloped gluten.
- Fix: Stir until just combined—small flour streaks are okay.
2. Using the Wrong Pumpkin
- Problem: Canned pumpkin pie filling (which has added sugar and spices) instead of pure pumpkin puree.
- Fix: Double-check labels for 100% pure pumpkin.
3. Overbaking
- Problem: Dry, crumbly texture.
- Fix: Bake for 20–25 minutes max and test with a toothpick.
4. Incorrect Ingredient Measurements
- Problem: Too much flour or pumpkin throws off moisture balance.
- Fix: Spoon flour into measuring cups (don’t scoop) and level off.
5. Skipping the Cooling Step
- Problem: Soggy bottoms from trapped steam.
- Fix: Let muffins cool in the pan for 5 minutes, then transfer to a rack.
8 Perfect Side Dish Pairings
Turn these muffins into part of a larger spread with these fall-friendly accompaniments:
- Vanilla Bean Yogurt Parfait – Layer with granola and pomegranate seeds.
- Apple Cinnamon Oatmeal – A hearty, spiced breakfast duo.
- Candied Bacon Strips – Sweet-salty contrast for a brunch platter.
- Fresh Fruit Salad – Toss apples, pears, and grapes with lemon juice.
- Sausage & Egg Scramble – A savory balance to the muffins’ sweetness.
- Cream Cheese-Stuffed Dates – A no-bake, elegant appetizer.
- Spiced Roasted Almonds – A crunchy, protein-packed snack.
- Hot Mulled Cider – Simmer with cinnamon sticks and orange slices.
How to Customize Your Muffins
This recipe is highly adaptable. Try these easy variations:
- Chocolate Chip Pumpkin Muffins – Fold in ½ cup semi-sweet or white chocolate chips.
- Nutty Crunch – Add ½ cup chopped pecans or walnuts to the batter.
- Streusel Topping – Replace cinnamon sugar with a buttery crumb mix (flour + brown sugar + butter).
- Vegan Version – Use flax eggs (1 tbsp flaxmeal + 3 tbsp water per egg) and coconut oil.
- Gluten-Free – Swap all-purpose flour for 1:1 gluten-free flour blend.
Pro Tip: For extra-moist muffins, replace the oil with applesauce (equal parts), but expect a slightly denser texture.
Proper storage is key to maintaining your pumpkin muffins’ moist texture and flavor. Follow these guidelines:
Room Temperature Storage
- Method: Place cooled muffins in an airtight container with a paper towel to absorb excess moisture.
- Duration: Stays fresh for 2–3 days.
- Tip: Add a slice of bread to the container to help retain moisture.
Refrigerating for Longer Freshness
- Method: Wrap individually in plastic wrap or store in a sealed container.
- Duration: Up to 1 week.
- Tip: Bring to room temperature or warm slightly before serving.
Freezing for Long-Term Storage
- Method:
- Cool muffins completely.
- Wrap each tightly in plastic wrap, then place in a freezer-safe bag.
- Remove as much air as possible to prevent freezer burn.
- Duration: Up to 3 months.
- Thawing:
- Overnight: Let sit at room temperature.
- Quick Thaw: Microwave for 15–20 seconds or warm in a 300°F oven for 5 minutes.
Reheating for Best Texture
- Microwave: 10–15 seconds for a soft, warm muffin.
- Oven: 5 minutes at 300°F restores a lightly crisp exterior.
- Air Fryer: 3–4 minutes at 320°F for a toasted top.
Recipe Tips for Perfect Muffins Every Time
- Use Fresh Spices – Old pumpkin pie spice loses potency. Check expiration dates.
- Adjust Sweetness – Reduce sugar to 1 cup if preferred, or substitute with brown sugar for deeper flavor.
- Boost Moisture – Add 1–2 tbsp sour cream or Greek yogurt for extra tenderness.
- Prevent Sticking – If not using liners, grease the tin thoroughly with butter or nonstick spray.
- Test for Doneness – A toothpick should come out with a few moist crumbs (not wet batter).
Frequently Asked Questions (FAQs)
Can I use fresh pumpkin instead of canned?
Yes! Roast sugar pumpkin (not carving pumpkins), puree the flesh, and drain excess liquid in a cheesecloth. Use 1¾ cups per batch.
Why did my muffins sink in the middle?
- Overmixing (develops too much gluten).
- Underbaking (center remains unstable).
- Too much leavener (baking soda/powder expires over time).
Can I make these muffins gluten-free?
Substitute all-purpose flour with a 1:1 gluten-free blend and add 1 tsp xanthan gum for structure.
How can I make these dairy-free?
The base recipe is dairy-free if using vegetable oil. For a butter substitute in toppings, use coconut oil or vegan butter.
Can I reduce the sugar for a healthier version?
Cut sugar to ¾ cup or use monk fruit sweetener. Note: Texture may be slightly denser.
Why are my muffins gummy?
- Overmeasured pumpkin (use a kitchen scale for accuracy).
- Undercooked center (extend baking time in 2-minute increments).
Can I bake this as a loaf instead?
Yes! Pour into a 9×5-inch loaf pan and bake at 350°F for 50–60 minutes.
Conclusion
These homemade pumpkin muffins are a foolproof, versatile treat that embodies the warmth of fall. With their moist crumb, spiced aroma, and crunchy cinnamon-sugar topping, they’re perfect for breakfasts, snacks, or holiday gatherings. The recipe adapts easily to dietary needs—whether gluten-free, vegan, or reduced-sugar.
Store them properly to enjoy fresh flavors for days, or freeze for instant cravings. Experiment with add-ins like chocolate chips, nuts, or a cream cheese swirl to make them your own. Once you try this recipe, it’s sure to become a seasonal tradition.
Final Tip: Double the batch—they disappear faster than you think!
The Best Homemade Pumpkin Muffins
Ingredients
- Makes 18 muffins
Dry Ingredients:
- 1 1/2 cups all-purpose flour
- 1 teaspoon baking powder
- 1/2 teaspoon baking soda
- 1/2 teaspoon salt
- 1 teaspoon pumpkin pie spice
Wet Ingredients:
- 1 15 oz can pure pumpkin (or homemade puree)
- 1/3 cup vegetable oil
- 2 large eggs
- 1 1/4 cups sugar
Topping:
- 1 tablespoon sugar
- 1 teaspoon cinnamon
Instructions
- Preheat the oven: Preheat your oven to 350°F (175°C). Line 18 muffin cups with paper liners.
- Mix dry ingredients: In a small bowl, whisk together the flour, baking powder, baking soda, salt, and pumpkin pie spice. Set aside.
- Mix wet ingredients: In a stand mixer fitted with the paddle attachment, mix the pumpkin puree, vegetable oil, eggs, and 1 1/4 cups of sugar on low speed until well combined.
- Combine wet and dry: Add the flour mixture to the wet ingredients and mix on low speed until just combined. Be careful not to overmix.
- Prepare topping: In a small bowl, stir together the remaining 1 tablespoon of sugar and the cinnamon.
- Fill and bake: Divide the batter evenly among the muffin cups, filling each about 2/3 full. Sprinkle the cinnamon-sugar topping evenly over each muffin.
- Bake: Bake for 20–25 minutes, or until the muffins are puffed, golden brown, and a toothpick inserted into the center comes out clean.
- Cool and serve: Let the muffins cool in the pan for 5 minutes before transferring them to a wire rack to cool completely.
- Notes
- Store in an airtight container at room temperature for up to 3 days or refrigerate for up to 1 week.
- Wrap individually and freeze for up to 3 months. Thaw at room temperature or warm in the microwave for 15–20 seconds.
- Optional add-ins: Mix in 1/2 cup chocolate chips, chopped nuts, or dried cranberries for extra flavor and texture.
