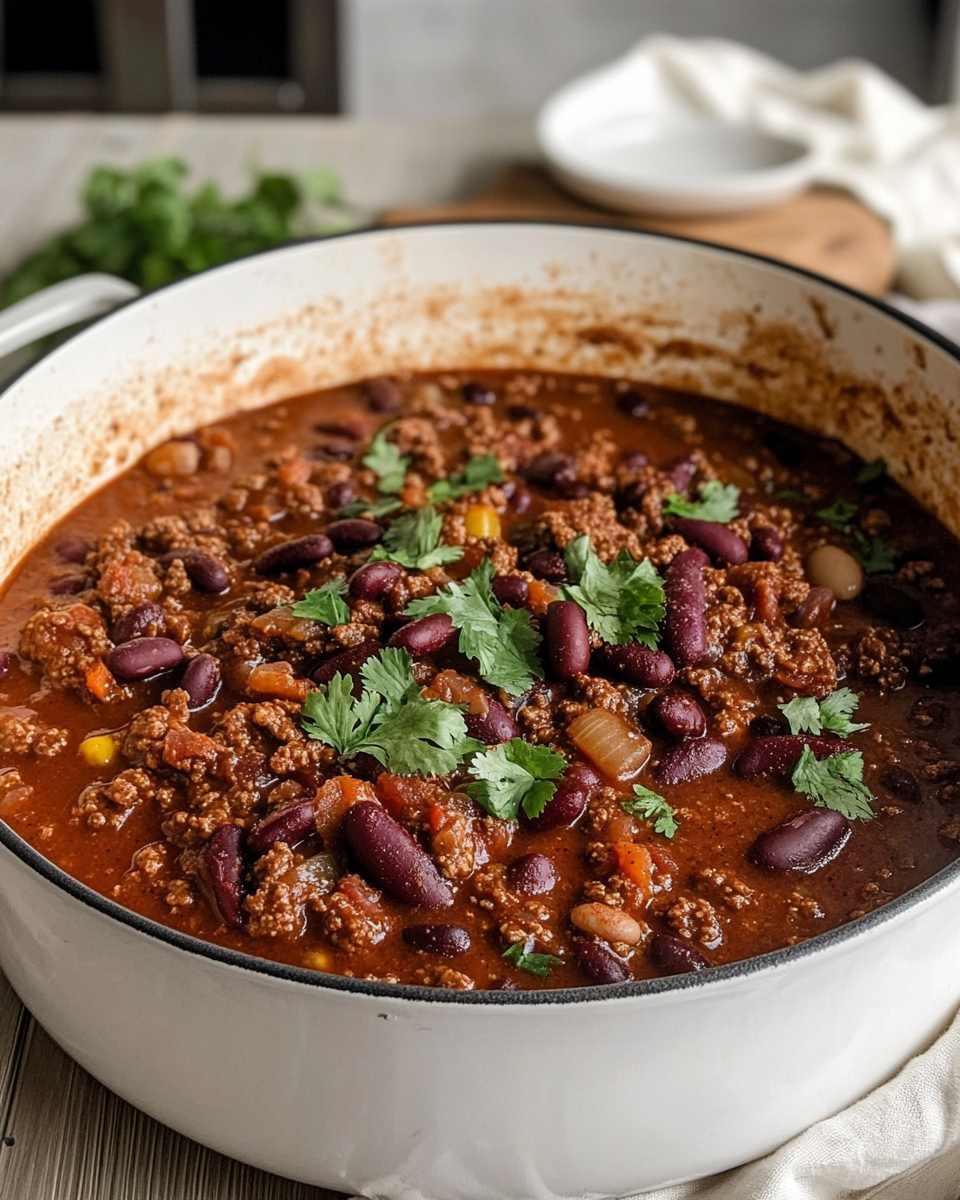
Few dishes deliver the same comfort and satisfaction as a well-made pot of homemade stovetop chili. This ground beef chili recipe strikes the perfect balance between hearty and flavorful, combining fire-roasted tomatoes, tender beans, and a carefully blended mix of spices. The addition of brown sugar adds subtle sweetness to complement the smoky heat, while beef broth and tomato paste create a rich, thick base that clings to every spoonful. Whether you’re feeding a hungry family or prepping meals for the week, this chili delivers crowd-pleasing results with minimal effort.

Preparation Phase & Tools
Essential Tools and Equipment
Making great chili starts with having the right tools. While you don’t need specialty equipment, these basics ensure consistent results:
- Large Dutch oven or heavy-bottomed pot: The ideal vessel for even heat distribution and preventing scorching during long simmering. Enameled cast iron works particularly well.
- Wooden spoon: Perfect for breaking up ground beef and stirring without damaging your cookware.
- Sharp chef’s knife and sturdy cutting board: Essential for efficiently dicing onions and mincing fresh garlic.
- Can opener: For easily accessing canned tomatoes and beans.
- Measuring spoons and cups: Critical for getting spice ratios and liquid measurements exactly right.
Importance of Each Tool
The Dutch oven’s thick walls and tight-fitting lid help maintain steady temperatures, allowing flavors to develop fully during the long simmer. A wooden spoon lets you scrape up the flavorful browned bits (called fond) from the bottom of the pot when deglazing with broth. Freshly minced garlic and properly chopped onions release their full aromatic potential when cut with a sharp knife, forming the flavor foundation of your chili.
Preparation Tips
- Mise en place: Chop all vegetables and measure spices before turning on the heat. Chili cooks quickly in the initial stages, and having everything ready prevents burning.
- Bean prep: Always drain and rinse canned beans to remove excess sodium and the starchy liquid that can make chili gluey.
- Meat selection: An 85/15 lean-to-fat ratio for ground beef provides richness without excessive greasiness. For leaner options, add 1 tablespoon of olive oil during cooking.
Ingredients
This recipe uses accessible ingredients that pack maximum flavor:
- 1 tablespoon olive oil – For sautéing vegetables
- 1 medium yellow onion, chopped – Sweet base note
- 1 lb ground beef – Hearty protein foundation
- 1 ½ teaspoons garlic, minced – Aromatic punch
- 3 tablespoons tomato paste – Concentrated umami
- 1 tablespoon ground cumin – Earthy warmth
- 1 tablespoon chili powder (optional) – Adjustable heat
- 1 tablespoon brown sugar – Balanced sweetness
- 1 teaspoon dried oregano – Herbal complexity
- ½ teaspoon salt – Flavor enhancer
- ¼ teaspoon black pepper – Subtle bite
- 1 ¾ cups beef broth – Liquid depth
- 1 (28 oz) can fire-roasted crushed tomatoes – Smoky acidity
- 1 (15 oz) can red kidney beans, drained and rinsed – Meaty texture
- 1 (15 oz) can pinto beans, drained and rinsed – Creamy contrast
Step-by-Step Directions
Follow these steps for foolproof chili every time:
- Heat olive oil in a Dutch oven over medium-high heat. Add chopped onions and sauté for 2 minutes until translucent but not browned.
- Add ground beef, breaking it into small crumbles with a wooden spoon. Cook for 5 minutes until no pink remains. Drain excess fat if needed.
- Stir in minced garlic and cook for 30 seconds until fragrant. Avoid burning, which creates bitterness.
- Add tomato paste, cumin, chili powder (if using), brown sugar, oregano, salt, and pepper. Stir vigorously to coat the beef and onions evenly.
- Pour in beef broth, scraping the pot’s bottom to dissolve any caramelized bits. This deglazing step builds deep flavor.
- Add fire-roasted tomatoes, kidney beans, and pinto beans. Stir gently to combine without breaking the beans.
- Bring to a lively boil, then immediately reduce heat to low. Cover and simmer for 1–2 hours, stirring occasionally to prevent sticking.
- During the last 30 minutes, remove the lid to reduce and thicken the chili to your preferred consistency.
Variations
- Spice control: For extra heat, add 1 diced jalapeño with the onions or ¼ teaspoon cayenne with the spices.
- Protein swaps: Replace ground beef with ground turkey or chorizo for different flavor profiles.
- Vegetarian version: Use lentils or mushrooms instead of beef, and substitute vegetable broth.
This foundational recipe provides the template for endless customization while guaranteeing a satisfying result. The long simmering time allows the spices to meld and the tomatoes to sweeten naturally, creating a chili that tastes like it cooked all day in just a fraction of the time.
A great bowl of homemade stovetop chili deserves thoughtful presentation and accompaniments. Beyond the basics of cooking, how you serve and what you pair with your chili can elevate it from everyday dinner to memorable meal. This section covers professional serving techniques, common pitfalls to avoid, and a curated list of side dishes that complement the rich flavors of your ground beef chili.
Serving Suggestions
The right toppings and serving methods enhance both flavor and texture:
- Classic Toppings
- Shredded cheddar cheese: Melts into the hot chili for creamy richness
- Sour cream: Cools the palate if your chili has spicy heat
- Fresh cilantro: Adds bright herbal notes to cut through the richness
- Sliced green onions: Provides crisp texture and mild onion flavor
- Creative Additions
- Crumbled cornbread: Stirred in for sweet contrast and thickening
- Pickled red onions: Introduces tangy acidity to balance the tomatoes
- Diced avocado: Offers creamy texture and healthy fats
For serving, preheat bowls in a low oven (200°F) for 5 minutes. This keeps the chili hot longer and improves flavor release. Ladle the chili first, then arrange toppings in small piles on one side for visual appeal.
Common Mistakes and How to Avoid Them
Even experienced cooks can encounter these chili challenges:
- Underseasoned Chili
- Problem: Flavors taste flat despite following the recipe
- Solution: Always taste and adjust seasoning after 30 minutes of simmering. The acidity of tomatoes mellows over time, often requiring an extra pinch of salt or dash of cumin.
- Greasy Texture
- Problem: Oil pools on the surface
- Solution: Use lean (85/15) ground beef and drain thoroughly after browning. For existing grease, chill the chili for 15 minutes, then skim solidified fat with a spoon.
- Burnt Bottom
- Problem: Charred bits ruin the flavor
- Solution: Maintain low heat during simmering and stir every 20 minutes, scraping the pot’s bottom. A heat diffuser can prevent hotspots on electric stoves.
- Watery Consistency
- Problem: Chili lacks thickness
- Solution: Simmer uncovered for the final 30 minutes. For quick fixes, mix 1 tablespoon cornstarch with 2 tablespoons cold water, then stir into the bubbling chili.
Perfecting Your Technique
Three professional methods to enhance your stovetop chili:
- Bloom the Spices
After adding cumin and chili powder to the beef, cook for 1 minute until fragrant. This toasting releases essential oils for deeper flavor. - Layer the Tomatoes
Add half the fire-roasted tomatoes early for developed flavor, and stir in the rest during the last 20 minutes for fresh acidity. - Rest Before Serving
Let the chili sit off-heat for 10 minutes after cooking. This allows flavors to harmonize and prevents scalding temperatures that mute taste.
Side Dish Recommendations
Pair your chili with these eight sides for balanced meals:
- Skillet Cornbread
The sweetness contrasts the chili’s heat, while the crumbly texture absorbs sauce beautifully. - Jalapeño Cheddar Biscuits
Spicy cheese biscuits add layers of flavor and a satisfying crunch. - Avocado Citrus Salad
Slices of avocado and grapefruit over greens provide refreshing contrast. - Roasted Sweet Potato Wedges
Their natural sugars caramelize during roasting, complementing the chili’s smokiness. - Vinegar-Based Coleslaw
The sharp tang cuts through the chili’s richness while adding crunch. - Cheesy Garlic Bread
Ideal for scooping up thicker chili versions. Toast under the broiler for maximum crispness. - Mexican Street Corn (Elote)
Grilled corn with cotija cheese and chili powder echoes the main dish’s flavors. - Crispy Tortilla Strips
Bake thin tortilla slices at 375°F for 8 minutes for a lighter alternative to chips.
The journey to perfect homemade stovetop chili doesn’t end when you turn off the burner. How you handle leftovers, reheat servings, and troubleshoot common questions determines whether your chili remains as delicious as when first prepared. This final section provides professional-grade advice to extend your chili’s quality and answer the most pressing questions home cooks encounter.
Advanced Recipe Tips
Elevate your next batch with these chef-approved techniques:
- Spice Blooming
Before adding to the pot, toast cumin and chili powder in a dry skillet over medium heat for 30 seconds. This intensifies their essential oils, creating deeper, more complex flavors in your ground beef chili. - Umami Boosters
Stir in 1 teaspoon fish sauce or 2 chopped anchovies with the garlic. These ingredients dissolve completely while adding savory depth without fishy taste. - Bean Selection
Combine three bean varieties instead of two – add black beans alongside kidney and pinto beans for varied textures. The different sizes and skins create more interesting mouthfeel. - Acid Balance
Finish the chili with 1 tablespoon apple cider vinegar or lime juice after cooking. This brightens the rich flavors and cuts through the heaviness of the beef and beans.
Storage and Reheating Instructions
Proper preservation maintains your chili’s texture and taste:
Refrigeration
- Container: Use airtight glass or BPA-free plastic containers
- Cooling: Portion chili into shallow containers (no deeper than 2 inches) to cool quickly
- Duration: Stores for 4 days at 40°F or below
- Prevention of “Bean Blowout”: Place a piece of parchment paper directly on the chili’s surface before sealing to prevent moisture loss and splitting beans
Freezing
- Best Method: Freeze in 2-cup portions using heavy-duty freezer bags laid flat
- Protection: Leave 1/2-inch headspace for expansion, remove all air
- Duration: Maintains quality for 3 months at 0°F
- Thawing: Overnight in refrigerator or 1 hour in cold water bath
Reheating
- Stovetop: Warm over medium-low heat with 1/4 cup beef broth or water, stirring frequently
- Microwave: Cover with damp paper towel, heat at 50% power in 2-minute intervals, stirring between
- Texture Restoration: If beans become mealy after freezing, stir in 1/2 cup freshly cooked beans during reheating
Frequently Asked Questions
Answers to the most common stovetop chili queries from home cooks:
Can I make this chili in a slow cooker?
Yes. After browning the beef and sautéing aromatics (Steps 1-4), transfer everything to a slow cooker. Cook on LOW for 6-7 hours or HIGH for 3-4 hours. The extended time makes the beef exceptionally tender.
How can I make my chili thicker?
Three effective methods:
- Mash 1/4 cup of beans against the pot side and stir in
- Simmer uncovered for additional 20-30 minutes
- Mix 1 tablespoon masa harina with 2 tablespoons cold water, then stir into bubbling chili
Is there a way to reduce the acidity?
The fire-roasted tomatoes can sometimes be too sharp. Neutralize with:
- 1/4 teaspoon baking soda (stir in gradually)
- 1 teaspoon honey or maple syrup
- 1/2 cup grated carrot cooked with the onions
Can I prepare this chili vegetarian?
Replace the ground beef with:
- 2 cups cooked lentils (French or black hold shape best)
- 12 oz meatless crumbles
- 3 cups diced mushrooms (cremini or portobello)
Use vegetable broth instead of beef broth for full vegetarian adaptation.
Why does my chili taste better the next day?
The resting period allows:
- Spices to fully hydrate and distribute evenly
- Tomato acids to mellow and sweeten naturally
- Fats to solidify and be easily removed before reheating
Conclusion
This homemade stovetop chili recipe delivers more than just a hearty meal—it provides a foundation for culinary creativity. From the initial sizzle of onions in the Dutch oven to the final sprinkle of cheese, each step builds layers of comforting flavor. The flexibility to adjust heat levels, swap proteins, or experiment with toppings makes this dish endlessly adaptable to personal tastes and occasions.
Remember that great chili relies on three principles: quality ingredients, patient simmering, and proper seasoning adjustments. Don’t hesitate to make it your own—whether that means adding a dash of smoked paprika for extra depth or serving it over sweet potato fries for a modern twist. When stored and reheated correctly, your chili may even surpass its original flavor, making it one of the most rewarding make-ahead dishes in your repertoire.
For those new to chili-making, follow the recipe exactly the first time, then begin experimenting. Seasoned cooks might try browning the beef in bacon fat or adding a square of dark chocolate during the final simmer. Every variation teaches something new about how flavors interact under heat and time.
Ultimately, this stovetop chili represents more than the sum of its parts—it’s a bowlful of warmth, tradition, and satisfaction that only homemade food can provide. Share it generously, because like all great comfort foods, it tastes best when enjoyed together.
The Best Homemade Stovetop Chili
Ingredients
- 1 tablespoon olive oil
- 1 medium yellow onion chopped
- 1 lb ground beef
- 1 ½ teaspoons garlic minced
- 3 tablespoons tomato paste
- 1 tablespoon ground cumin
- 1 tablespoon chili powder optional, for spicier chili
- 1 tablespoon brown sugar
- 1 teaspoon dried oregano
- ½ teaspoon salt
- ¼ teaspoon black pepper
- 1 ¾ cups beef broth
- 1 28 oz can fire-roasted crushed tomatoes
- 1 15 oz can red kidney beans, drained and rinsed
- 1 15 oz can pinto beans, drained and rinsed
- Optional Toppings
- Shredded cheddar cheese
- Sour cream
- Green onions
- Cilantro
Instructions
- Heat the olive oil in a large Dutch oven or heavy pot over medium-high heat.
- Add the chopped onion and sauté for about 2 minutes, until softened.
- Add the ground beef and cook for about 5 minutes, breaking it up as it browns. Drain any excess fat.
- Stir in the minced garlic and cook for 30 seconds until fragrant.
- Add the chili powder (if using), cumin, brown sugar, oregano, salt, pepper, and tomato paste. Stir well to combine.
- Pour in the beef broth, scraping up any browned bits from the bottom of the pot.
- Stir in the fire-roasted crushed tomatoes, kidney beans, and pinto beans.
- Bring the chili to a boil, then reduce heat to low. Cover and simmer for 1–2 hours, stirring occasionally.
- In the last 30 minutes, uncover the pot to allow the chili to thicken.
- Serve hot with your favorite toppings like shredded cheddar cheese, sour cream, green onions, or cilantro.


