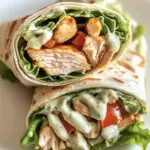
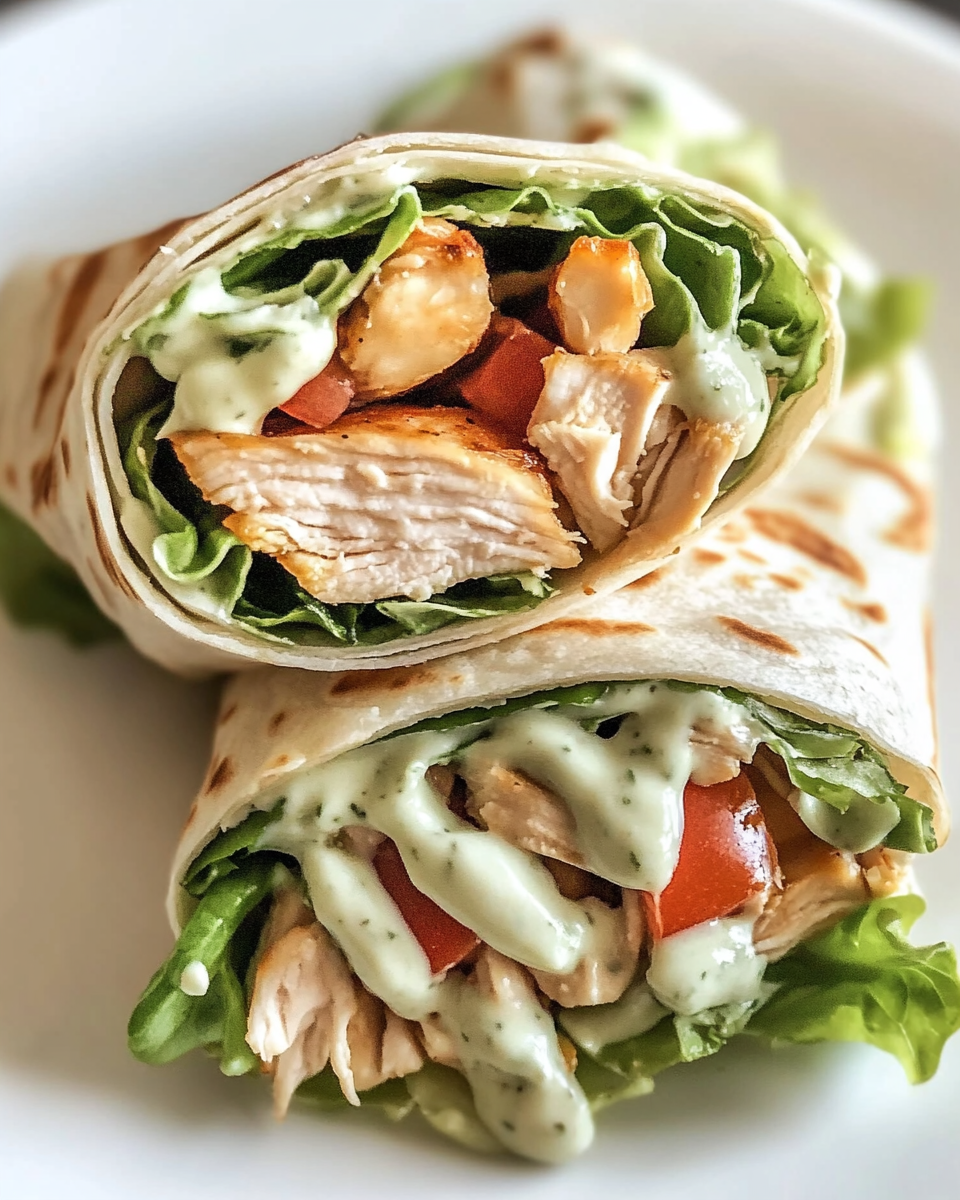
Picture this: juicy rotisserie chicken, crispy bacon, and fresh vegetables bundled in a soft flour tortilla with a creamy ranch dressing drizzle. These flavorful rotisserie chicken wraps are the ultimate solution for busy weekdays, lazy weekends, or even last-minute entertaining. They combine convenience with bold flavors, making them a hit with adults and kids alike. What sets them apart? The use of pre-cooked rotisserie chicken saves time without sacrificing taste, while the crunchy bacon and tangy ranch add layers of texture and richness. Best of all, you can customize them with your favorite veggies or sauces for a personal touch.
Preparation Phase & Tools to Use
Before diving into the recipe, gather the right tools to streamline the process. Here’s what you’ll need:
- Mixing Bowls: Ideal for tossing the chicken with ranch dressing to ensure every bite is flavorful.
- Cutting Board and Sharp Knife: Essential for dicing tomatoes, chopping green onions, and shredding the chicken evenly.
- Measuring Cups and Spoons: Precision matters, especially with dressings and cheeses, to avoid overpowering the wrap.
- Tortilla Warmer (Optional): Lightly warming tortillas makes them more pliable and less likely to crack when rolled.
Importance of Each Tool
Understanding why these tools matter helps perfect the recipe. A sharp knife ensures uniform cuts, so each wrap has balanced ingredients in every bite. Measuring the ranch dressing prevents sogginess, while warm tortillas are easier to fold without tearing. Prepping ingredients ahead of time—known as mise en place—saves effort during assembly.
Preparation Tips
Follow these tips for flawless wraps every time:
- Pat the rotisserie chicken dry with paper towels to remove excess moisture, which can make the tortillas soggy.
- Chop all vegetables and bacon before assembling to speed up the process.
- Place a lettuce leaf at the base of each tortilla to act as a moisture barrier between the wrap and wet ingredients like ranch or tomatoes.
Ingredients List
Here’s everything you’ll need for two hearty wraps:
- Protein: 1 ½ cups rotisserie chicken (finely chopped), ¼ cup crispy bacon (chopped).
- Dairy: ¼ cup ranch dressing, ⅓ cup shredded cheddar cheese.
- Vegetables: ¼ cup diced tomatoes, ¼ cup chopped green onions, 2 large leaves green leaf lettuce (or substitute with spinach or kale).
- Base: 2 (10-inch) flour tortillas (whole wheat or spinach tortillas work too).
Step-by-Step Directions
- Prepare the Tortillas and Lettuce
Lay the tortillas flat on a clean surface. Place one lettuce leaf in the center of each tortilla to create a protective layer. - Add the Shredded Chicken
Divide the chopped rotisserie chicken evenly between the tortillas, arranging it in a line down the center of the lettuce. - Layer Additional Ingredients
Drizzle 2 tablespoons of ranch dressing over the chicken on each tortilla. Sprinkle shredded cheese, bacon, tomatoes, and green onions evenly on top. - Roll the Wraps
Fold the bottom edge of each tortilla over the filling, then fold in the sides. Roll tightly from the bottom to encase all ingredients. - Serve and Enjoy
Slice the wraps in half diagonally for easy handling. Serve immediately with extra ranch dressing on the side if desired.
Variations and Substitutions
- Swap ranch dressing for spicy mayo or blue cheese dressing for a twist.
- Add avocado slices or cucumber for extra freshness.
- Use low-carb tortillas or lettuce leaves for a lighter option.
These flavorful rotisserie chicken wraps shine brightest when served fresh, but how you present them can elevate the experience. For packed lunches, wrap them tightly in parchment paper and secure with kitchen twine to prevent unraveling. This method keeps them neat while adding rustic charm. If serving at gatherings, slice the wraps into one-inch pinwheels and arrange them on a platter with toothpicks for easy grabbing. The vibrant colors of the fresh vegetables against the golden tortilla make these as visually appealing as they are delicious.
Common Mistakes to Avoid
Even simple recipes can go wrong without proper technique. Here are the most frequent pitfalls and how to avoid them:
- Overstuffing the Wraps
Piling on too many ingredients leads to torn tortillas and messy eating. Stick to about 1 cup of filling per 10-inch tortilla, distributing ingredients evenly in a horizontal line slightly below the center. - Using Cold Tortillas
Straight-from-the-fridge tortillas crack when folded. Always bring them to room temperature or warm them briefly (about 10 seconds per side in a dry skillet or 15 seconds in the microwave between damp paper towels). - Skipping the Lettuce Barrier
The lettuce layer isn’t just for crunch—it prevents moisture from the chicken and dressing from making the tortilla soggy. If you dislike lettuce, try a thin layer of shredded cheese instead, which melts slightly to create a protective seal. - Dressing Distribution Problems
Drizzling ranch directly onto the tortilla (rather than over the chicken) can make the wrap slippery. For even flavor, mix half the dressing with the chicken before assembling, then drizzle the rest on top.
How to Perfect the Recipe
Take your wraps from good to exceptional with these pro techniques:
- Season the Chicken
While rotisserie chicken is flavorful on its own, a pinch of smoked paprika or garlic powder enhances its depth. Toss the chopped chicken with these spices before adding dressing. - Press for Crispness
For a warm, crispy wrap, assemble it with cold ingredients, then press it in a panini press or grill pan for 2-3 minutes until golden. This melts the cheese and bonds the layers. - Balance Textures
Contrast the creamy ranch and tender chicken with extra-crispy bacon (bake it at 400°F for 18 minutes instead of frying) and finely shredded cabbage for added crunch.
Side Dish Recommendations
Pair these wraps with sides that complement their rich, creamy profile:
- Classic Caesar Salad
The garlicky dressing and crunchy croutons mirror the wrap’s textures. Use kale for a sturdier green that won’t wilt. - Sweet Potato Fries
Their natural sweetness offsets the salty bacon and ranch. Toss fries with rosemary and sea salt before baking. - Grilled Corn on the Cob
Brush ears with chili-lime butter for a smoky, tangy counterpart to the wraps. - Creamy Coleslaw
A vinegar-based slaw (rather than mayo-heavy) cuts through the richness. Add caraway seeds for an unexpected twist. - Garlic Parmesan Roasted Broccoli
Roast florets at 425°F until edges crisp. The nutty parmesan echoes the wrap’s cheese. - Cucumber Avocado Salad
Thinly sliced cucumbers and avocado in a lemon-dill dressing provide a cooling contrast. - Crispy Onion Rings
Bake them with panko breadcrumbs for a lighter version that still delivers crunch. - Quinoa Tabbouleh
A protein-packed, herbaceous option with parsley, mint, and cherry tomatoes.
Achieving wrap perfection requires more than just following the recipe. These professional tips will elevate your results:
- Meal Prep Efficiency
Prepare all ingredients up to 2 days in advance, but store components separately. Keep chopped vegetables in airtight containers with paper towels to absorb moisture. Mix chicken with dressing only when ready to assemble to prevent sogginess. - Tortilla Selection
For superior structural integrity, choose fresh, pliable 10-inch flour tortillas. If only smaller tortillas are available, overlap two slightly to create a larger surface area. For low-carb options, try almond flour or coconut wraps, which hold up better than lettuce when transporting. - Flavor Boosters
Add ½ teaspoon of smoked paprika or chipotle powder to the ranch dressing for a smoky kick. For Mediterranean flair, substitute feta cheese and add kalamata olives with tzatziki sauce instead of ranch. - Texture Considerations
Layer ingredients strategically: cheese directly against warm chicken helps it melt slightly, acting as a glue. Place crispier elements like bacon near the outer layers for maximum crunch in every bite.
Storage and Reheating Instructions
Proper storage maintains quality and food safety:
- Refrigeration
Store assembled wraps tightly wrapped in parchment paper followed by aluminum foil for up to 24 hours. The foil blocks air exposure while parchment prevents sticking. For longer storage (2-3 days), keep components separate and assemble when needed. - Freezing
While possible, freezing affects texture. If necessary, freeze just the chicken mixture (without fresh veggies) for up to 1 month. Thaw overnight in the refrigerator before assembling with fresh ingredients. - Reheating Methods
For warm wraps:
- Unwrap completely and remove any cold ingredients like lettuce or tomatoes
- Microwave chicken portion for 45 seconds
- Reassemble with fresh cold ingredients
For crispier results, reheat in a 350°F oven for 8-10 minutes wrapped in foil, then finish with 2 minutes unwrapped.
Frequently Asked Questions
Can I use grilled chicken instead of rotisserie?
Absolutely. While rotisserie chicken offers convenience and consistent flavor, grilled chicken works well. Marinate boneless thighs in buttermilk for 4 hours before grilling to achieve similar juiciness. Shred while warm for optimal texture.
How can I make these wraps gluten-free?
Use certified gluten-free tortillas and confirm all packaged ingredients (especially ranch dressing and bacon) are GF. Many store-bought rotisserie chickens contain gluten in seasonings, so check labels or roast your own.
What’s the best way to pack these for lunch?
Use a three-layer method:
- Wax paper directly against the wrap
- Aluminum foil over that to maintain temperature
- Place in an insulated container with an ice pack
Add dressing in a separate small container for dipping.
Can I prepare a large batch for a crowd?
For parties, set up a wrap bar with:
- Warm tortillas in a tortilla warmer
- Separate bowls of all ingredients
- Several sauce options
Let guests assemble their own to prevent sogginess.
How can I boost the protein content?
Add ¼ cup of black beans or chickpeas per wrap. For extra protein without changing flavor, mix 2 tablespoons of unflavored collagen peptides into the ranch dressing.
Flavorful Rotisserie Chicken Wraps
Ingredients
- 2 10-inch flour tortillas
- 2 leaves green leaf lettuce or greens of your choice
- 1 ½ cups rotisserie chicken finely chopped
- ¼ cup ranch dressing
- ⅓ cup cheddar cheese shredded
- ¼ cup crispy bacon chopped
- ¼ cup tomatoes diced
- ¼ cup green onions chopped
Instructions
- Prepare the Tortillas and Lettuce
- Lay the tortillas flat on a clean surface.
- Place a lettuce leaf in the center of each tortilla to help prevent sogginess.
- Add the Shredded Chicken
- Evenly distribute the chopped rotisserie chicken between the tortillas.
- Place the chicken in a line down the center of the lettuce.
- Layer Additional Ingredients
- Drizzle 2 tablespoons of ranch dressing over the chicken on each tortilla.
- Sprinkle the shredded cheese, bacon, diced tomatoes, and green onions evenly on top.
- Roll the Wraps
- Fold the ends of each tortilla toward the center.
- Roll tightly to secure the fillings inside.
- Serve and Enjoy
- Slice the wraps in half for easy handling.
- Serve immediately with extra ranch dressing on the side, if desired.
- Notes
- Best served fresh but can be stored in an airtight container in the refrigerator for up to 24 hours.
- Customize with extra toppings like avocado, cucumbers, or spicy ranch dressing.
