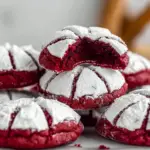
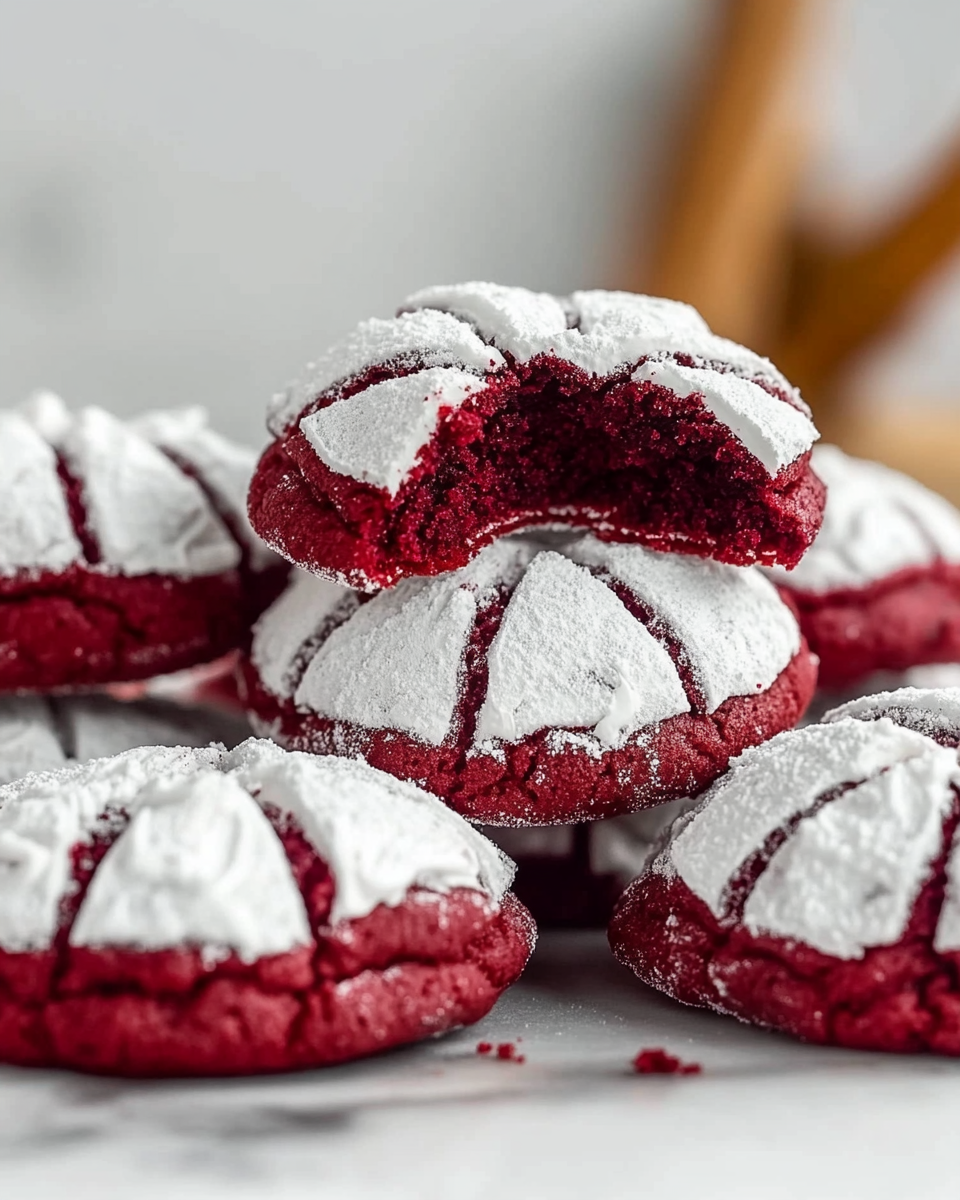
Red Velvet Crinkle Cookies are a stunning twist on classic chocolate cookies, blending the deep, cocoa-rich flavor of red velvet with a soft, chewy center and a crackled powdered sugar coating. These vibrant treats are perfect for holidays, Christmas parties, or any occasion where you want a dessert that’s as visually striking as it is delicious. Their fudgy texture and subtle vanilla undertones make them irresistible, while the signature crinkled top adds a touch of elegance. Whether you’re a beginner or an experienced baker, this recipe is straightforward yet impressive—guaranteed to earn compliments.
Preparation Phase & Essential Tools
Before diving into the recipe, gather the right tools to ensure success:
- Mixing Bowls
Use stainless steel or glass bowls for combining ingredients. Their non-reactive surfaces prevent off-flavors and make cleanup easier. - Electric Mixer
A hand mixer or stand mixer is crucial for creaming butter and sugar to the right fluffy consistency. This step incorporates air, giving the cookies a lighter texture. - Measuring Cups and Spoons
Precision matters in baking. Measure flour, cocoa powder, and other dry ingredients accurately to avoid dense or dry cookies. - Parchment Paper
Lining baking sheets with parchment prevents sticking and promotes even browning without greasing. - Cookie Scoop
A scoop ensures uniform dough balls, which bake evenly and look professional. - Wire Rack
Cooling cookies on a rack prevents soggy bottoms by allowing air circulation.
Why These Tools Matter
- Chilling the dough is easier when you have airtight containers or plastic wrap to cover the mixing bowl. This step is non-negotiable—it firms up the dough for better shaping and enhances the crinkle effect.
- A cookie scoop saves time and ensures consistent sizing, so cookies bake uniformly.
- Parchment paper eliminates the need for extra butter or flour, keeping the cookies tender.
Preparation Tips for Perfect Dough
- Butter Temperature
Use softened butter (leave it at room temperature for 30–60 minutes). Too cold, and it won’t cream properly; too warm, and the dough becomes greasy. - Sifting Dry Ingredients
Sift flour and cocoa powder together to remove lumps and ensure a smooth, evenly mixed dough. - Food Coloring Choice
Gel-based red food coloring delivers a bold hue without thinning the dough. Liquid coloring may require adjustments to maintain consistency.
Ingredients List
Dry Ingredients
- 1 ½ cups all-purpose flour
- ½ cup unsweetened cocoa powder (sifted)
- 1 teaspoon baking powder
- ¼ teaspoon salt
Wet Ingredients
- ½ cup unsalted butter (softened)
- 1 cup granulated sugar
- 2 large eggs (room temperature)
- 1 teaspoon vanilla extract
- 1 tablespoon red food coloring (gel preferred)
Coating
- ½ cup powdered sugar (for rolling)
Step-by-Step Instructions
- Preheat and Prep
Heat the oven to 350°F (175°C). Line two baking sheets with parchment paper. - Combine Dry Ingredients
In a medium bowl, whisk together flour, cocoa powder, baking powder, and salt. Set aside. - Cream Butter and Sugar
In a large bowl, beat softened butter and granulated sugar with an electric mixer for 2–3 minutes until light and fluffy. - Add Eggs and Flavorings
Beat in eggs one at a time, then mix in vanilla extract and red food coloring until fully incorporated. - Incorporate Dry Ingredients
Gradually add the dry mixture to the wet ingredients, mixing just until combined. Overmixing leads to tough cookies. - Chill the Dough
Cover the bowl and refrigerate for at least 30 minutes. This reduces stickiness and helps the cookies hold their shape. - Shape and Coat
Scoop chilled dough into 1-inch balls, then roll each generously in powdered sugar. Place them 2 inches apart on baking sheets. - Bake
Bake for 10–12 minutes until the edges set but centers remain soft. The cookies will develop cracks as they bake. - Cool
Let cookies rest on the baking sheet for 2–3 minutes before transferring to a wire rack to cool completely.
Pro Tips for Success
- For deeper red color, add an extra ½ teaspoon food coloring.
- Roll dough balls in powdered sugar twice for a thicker, snow-like coating.
- If dough becomes too soft while shaping, rechill for 10–15 minutes.
Freshly baked Red Velvet Crinkle Cookies deserve to be showcased and enjoyed to their fullest potential. Beyond their stunning appearance, these cookies pair wonderfully with complementary flavors and make an elegant addition to dessert tables. Here’s how to serve them like a pro, avoid common pitfalls, and create unforgettable flavor combinations.
Serving Suggestions for Maximum Impact
The vibrant red hue and snowy sugar coating of these cookies make them natural showstoppers. Consider these presentation ideas:
- Holiday Cookie Trays
Arrange cookies alongside other festive treats like peppermint bark or gingerbread men for a colorful holiday spread. The contrast between red, white, and brown desserts creates visual appeal. - Dessert Charcuterie Boards
Pair cookies with cream cheese dip, fresh berries, and dark chocolate shavings for an interactive dessert experience. The tanginess of cream cheese echoes classic red velvet cake flavors. - Individual Gift Boxes
Layer cookies in clear treat bags tied with ribbon, or place them in decorative tins for edible gifts. Include a recipe card so recipients can recreate them. - Plated Desserts
Crumble cookies over vanilla ice cream or cheesecake for a textural contrast, or serve alongside espresso for a sophisticated after-dinner treat.
Common Mistakes and How to Fix Them
Even experienced bakers encounter issues with crinkle cookies. Here are frequent problems and their solutions:
- Cookies Spread Too Much
Cause: Dough wasn’t chilled long enough, or butter was too warm.
Fix: Refrigerate dough for at least 30 minutes (or up to 2 hours) before baking. Ensure butter is softened but not melted. - Powdered Sugar Disappears During Baking
Cause: Insufficient coating or dough that’s too wet.
Fix: Roll dough balls twice—once before chilling and once right before baking. Pat excess moisture off with a paper towel if needed. - Cookies Are Dry or Cakey
Cause: Overbaking or too much flour.
Fix: Measure flour with the spoon-and-level method (don’t scoop directly from the bag). Bake just until edges set—centers should look slightly underdone. - Lack of Deep Red Color
Cause: Low-quality food coloring or insufficient quantity.
Fix: Use gel-based coloring (1–2 tbsp) for vibrancy without altering dough consistency.
Perfecting the Recipe: Pro Techniques
Take your cookies from good to extraordinary with these refinements:
- The Double-Sugar Trick
For pronounced cracks, roll dough balls in granulated sugar first, then in powdered sugar. The granulated sugar creates space for the powdered sugar to “crinkle.” - Temperature Control
Use an oven thermometer to verify 350°F (175°C). Rotate baking sheets halfway through for even browning. - Texture Customization
Prefer fudgy centers? Underbake by 1 minute. Like crisp edges? Extend baking by 1–2 minutes.
8 Perfect Pairings for Red Velvet Crinkle Cookies
Balance the cookies’ richness with these accompaniments:
- Vanilla Bean Ice Cream
The creamy sweetness offsets the cocoa intensity. - Whipped Mascarpone
A lighter alternative to cream cheese frosting. - Fresh Raspberries
Their tartness cuts through the sweetness. - Hot Chocolate
Double down on chocolatey warmth. - Candied Pecans
Adds crunch and buttery depth. - Espresso or Cold Brew
Coffee enhances the cocoa flavor. - Sparkling Rosé
A festive drink pairing for parties. - White Chocolate Drizzle
Melts over warm cookies for extra decadence.
Even the most perfectly baked Red Velvet Crinkle Cookies need proper care to maintain their texture and flavor. Whether you’re preparing them in advance or saving leftovers, these storage solutions and expert tips will ensure your cookies stay fresh and delicious. Plus, we address the most common questions bakers have about this festive treat.
Storing Your Cookies for Maximum Freshness
Proper storage is key to preserving the cookies’ chewy texture and vibrant color:
- Room Temperature Storage
Place cooled cookies in an airtight container with parchment paper between layers to prevent sticking. They’ll stay fresh for up to 5 days at room temperature. - Refrigerating for Longevity
While not necessary, refrigeration can extend shelf life to 7–10 days. Let cookies come to room temperature before serving to restore softness. - Freezing for Future Use
These cookies freeze exceptionally well:- Baked Cookies: Freeze in a single layer before transferring to a freezer bag for up to 3 months. Thaw at room temperature for 30 minutes.
- Dough Balls: Arrange unbaked, sugar-coated dough balls on a tray to freeze solid, then store in a freezer bag. Bake straight from frozen, adding 1–2 extra minutes to the baking time.
Reheating for Fresh-Baked Taste
Revive day-old cookies with these simple methods:
- Oven Refreshing
Warm cookies on a baking sheet at 300°F (150°C) for 3–5 minutes to restore crisp edges and soft centers. - Microwave Trick
Place a cookie on a microwave-safe plate and heat for 5–10 seconds. Be cautious—overheating can make them tough.
Recipe Tips for Consistent Results
- Maintaining Vibrant Color
Store cookies away from direct sunlight to prevent the red hue from fading. - Preventing Sugar Melt-Off
If your powdered sugar coating absorbs into the cookies, try rolling them in sugar just before baking rather than before chilling. - Adjusting for Humidity
In damp climates, add 1–2 tablespoons of extra flour to the dough to prevent excessive spreading.
Frequently Asked Questions
Here are answers to the most searched questions about Red Velvet Crinkle Cookies:
1. Can I make these cookies without food coloring?
Yes, but they’ll be brown rather than red. For a natural alternative, try beet powder (1–2 tbsp), though the color will be muted.
2. Why are my cookies cakey instead of fudgy?
Overmixing the dough or using too much flour can create a cake-like texture. Mix just until ingredients combine, and measure flour carefully.
3. Can I use Dutch-process cocoa instead of natural cocoa powder?
Yes, but since Dutch-process cocoa is less acidic, pair it with ½ teaspoon baking soda (replace the baking powder) for proper rise.
4. How do I get more dramatic cracks?
Ensure your dough is thoroughly chilled, and roll the balls tightly. The contrast between the cold interior and hot oven promotes cracking.
5. Can I halve or double this recipe?
Absolutely. For halving, use 1 egg by beating it first and adding half (about 2 tbsp). Doubling works without adjustments.
6. Are these cookies suitable for shipping?
Yes! Pack them in a rigid container with cushioning (like parchment or bubble wrap) to prevent crushing. Avoid shipping in extreme heat.
Conclusion: A Timeless Treat for Every Occasion
Red Velvet Crinkle Cookies are more than just a dessert—they’re a celebration of texture, color, and flavor. With their fudgy centers, crackled tops, and eye-catching red hue, they’re perfect for holiday gatherings, Valentine’s Day, or any time you want to add a touch of whimsy to your baking.
By mastering the techniques in this guide—from proper chilling and baking to storage and troubleshooting—you’ll create cookies that impress visually and delight with every bite. Don’t hesitate to experiment with variations, whether it’s swapping food colors for different seasons or pairing them with inventive accompaniments.
Red Velvet Crinkle Cookies
Ingredients
- 1 1/2 cups all-purpose flour
- 1/2 cup unsweetened cocoa powder
- 1 teaspoon baking powder
- 1/4 teaspoon salt
- 1/2 cup unsalted butter softened
- 1 cup granulated sugar
- 2 large eggs
- 1 teaspoon vanilla extract
- 1 tablespoon red food coloring
- 1/2 cup powdered sugar for rolling
Instructions
- Preheat the oven to 350°F (175°C). Line two baking sheets with parchment paper and set aside.
- In a medium bowl, whisk together the flour, cocoa powder, baking powder, and salt.
- In a large mixing bowl, beat the softened butter and granulated sugar until light and fluffy, about 2–3 minutes.
- Add the eggs one at a time, beating well after each addition. Stir in the vanilla extract and red food coloring until fully combined.
- Gradually mix the dry ingredients into the wet ingredients until a soft, slightly sticky dough forms.
- Cover the dough and refrigerate for at least 30 minutes to make it easier to handle and help the cookies retain their shape.
- Scoop the chilled dough into 1-inch balls. Roll each ball thoroughly in powdered sugar to coat.
- Place the coated dough balls on the prepared baking sheets, leaving about 2 inches between each one.
- Bake for 10–12 minutes, or until the cookies are set but still soft in the center. They should appear crackled on top.
- Let the cookies cool on the baking sheet for a few minutes, then transfer them to a wire rack to cool completely.
- Notes
- Chilling the dough is key to getting the classic crinkle look and preventing excess spreading.
- Store cookies in an airtight container at room temperature for up to 5 days.
- You can freeze the baked cookies or dough balls for longer storage.
- Try using different food coloring for seasonal variations!
